Buying, installing and signing in
You buy the package on the website, or first try the Pro package free for 7 days. There are two ways to install Cage Mold: on Windows you download and open the Cage Mold program, Blender included, or you add the extension to your own Blender with Blender's extension system. Either way you sign in once; the mold engine downloads by itself, and new versions come as updates. This chapter walks through every step with every window you will see.
What you need
| Requirement | Detail |
|---|---|
| Blender | Not needed for the Windows program: it brings its own Blender (5.2 LTS). To add the extension to your own Blender: 5.0 or newer (tested with 5.0 and 5.2); download Blender free from blender.org. |
| Computer | The program: Windows 10 or 11, 64-bit, about 700 MB of disk space. The extension: Windows x64, a Mac with Apple silicon (M1 and later) or Linux x64. The mold is computed in the background, so Blender never freezes; the finest detail (Finest) can take a few minutes on large models. |
| Licence | A Cage Mold package: Lite, Core or Pro (chapter 1). One licence works on two computers. There is no free version, but you can try the Pro package free for 7 days on one computer before you buy (below). |
| Internet | Needed to install and to sign in. A bought licence then renews silently every day and works 14 days without a connection; the 7-day trial checks online for every mold and does not work without a connection. Blender's Allow Online Access must be on (Blender asks on its first start). |
| Model file | STL, OBJ or 3MF. It should be in millimetres and a closed (watertight) surface; Heal repairs open or broken surfaces. |
1. Buy the package
If you want to try first, skip this step for now: install Cage Mold (step 2), sign in (step 3) and start the 7-day Pro trial on the page that opens (below). You buy the package during the trial or after it, with the same e-mail address.
- Compare the packages
The cagemold.com/pricing page shows the three packages and what each holds. Look at the mold types you need: Lite is enough for a silicone box and a tray; Core adds the candle mold (Two-Part), the four-part box, the grams and Step by Step; Pro adds Multi-Part, Cored Mold, Slip Cast, Injection Mold and tools such as Pocket Fill and Watermark. You can move up any time later by paying the difference.
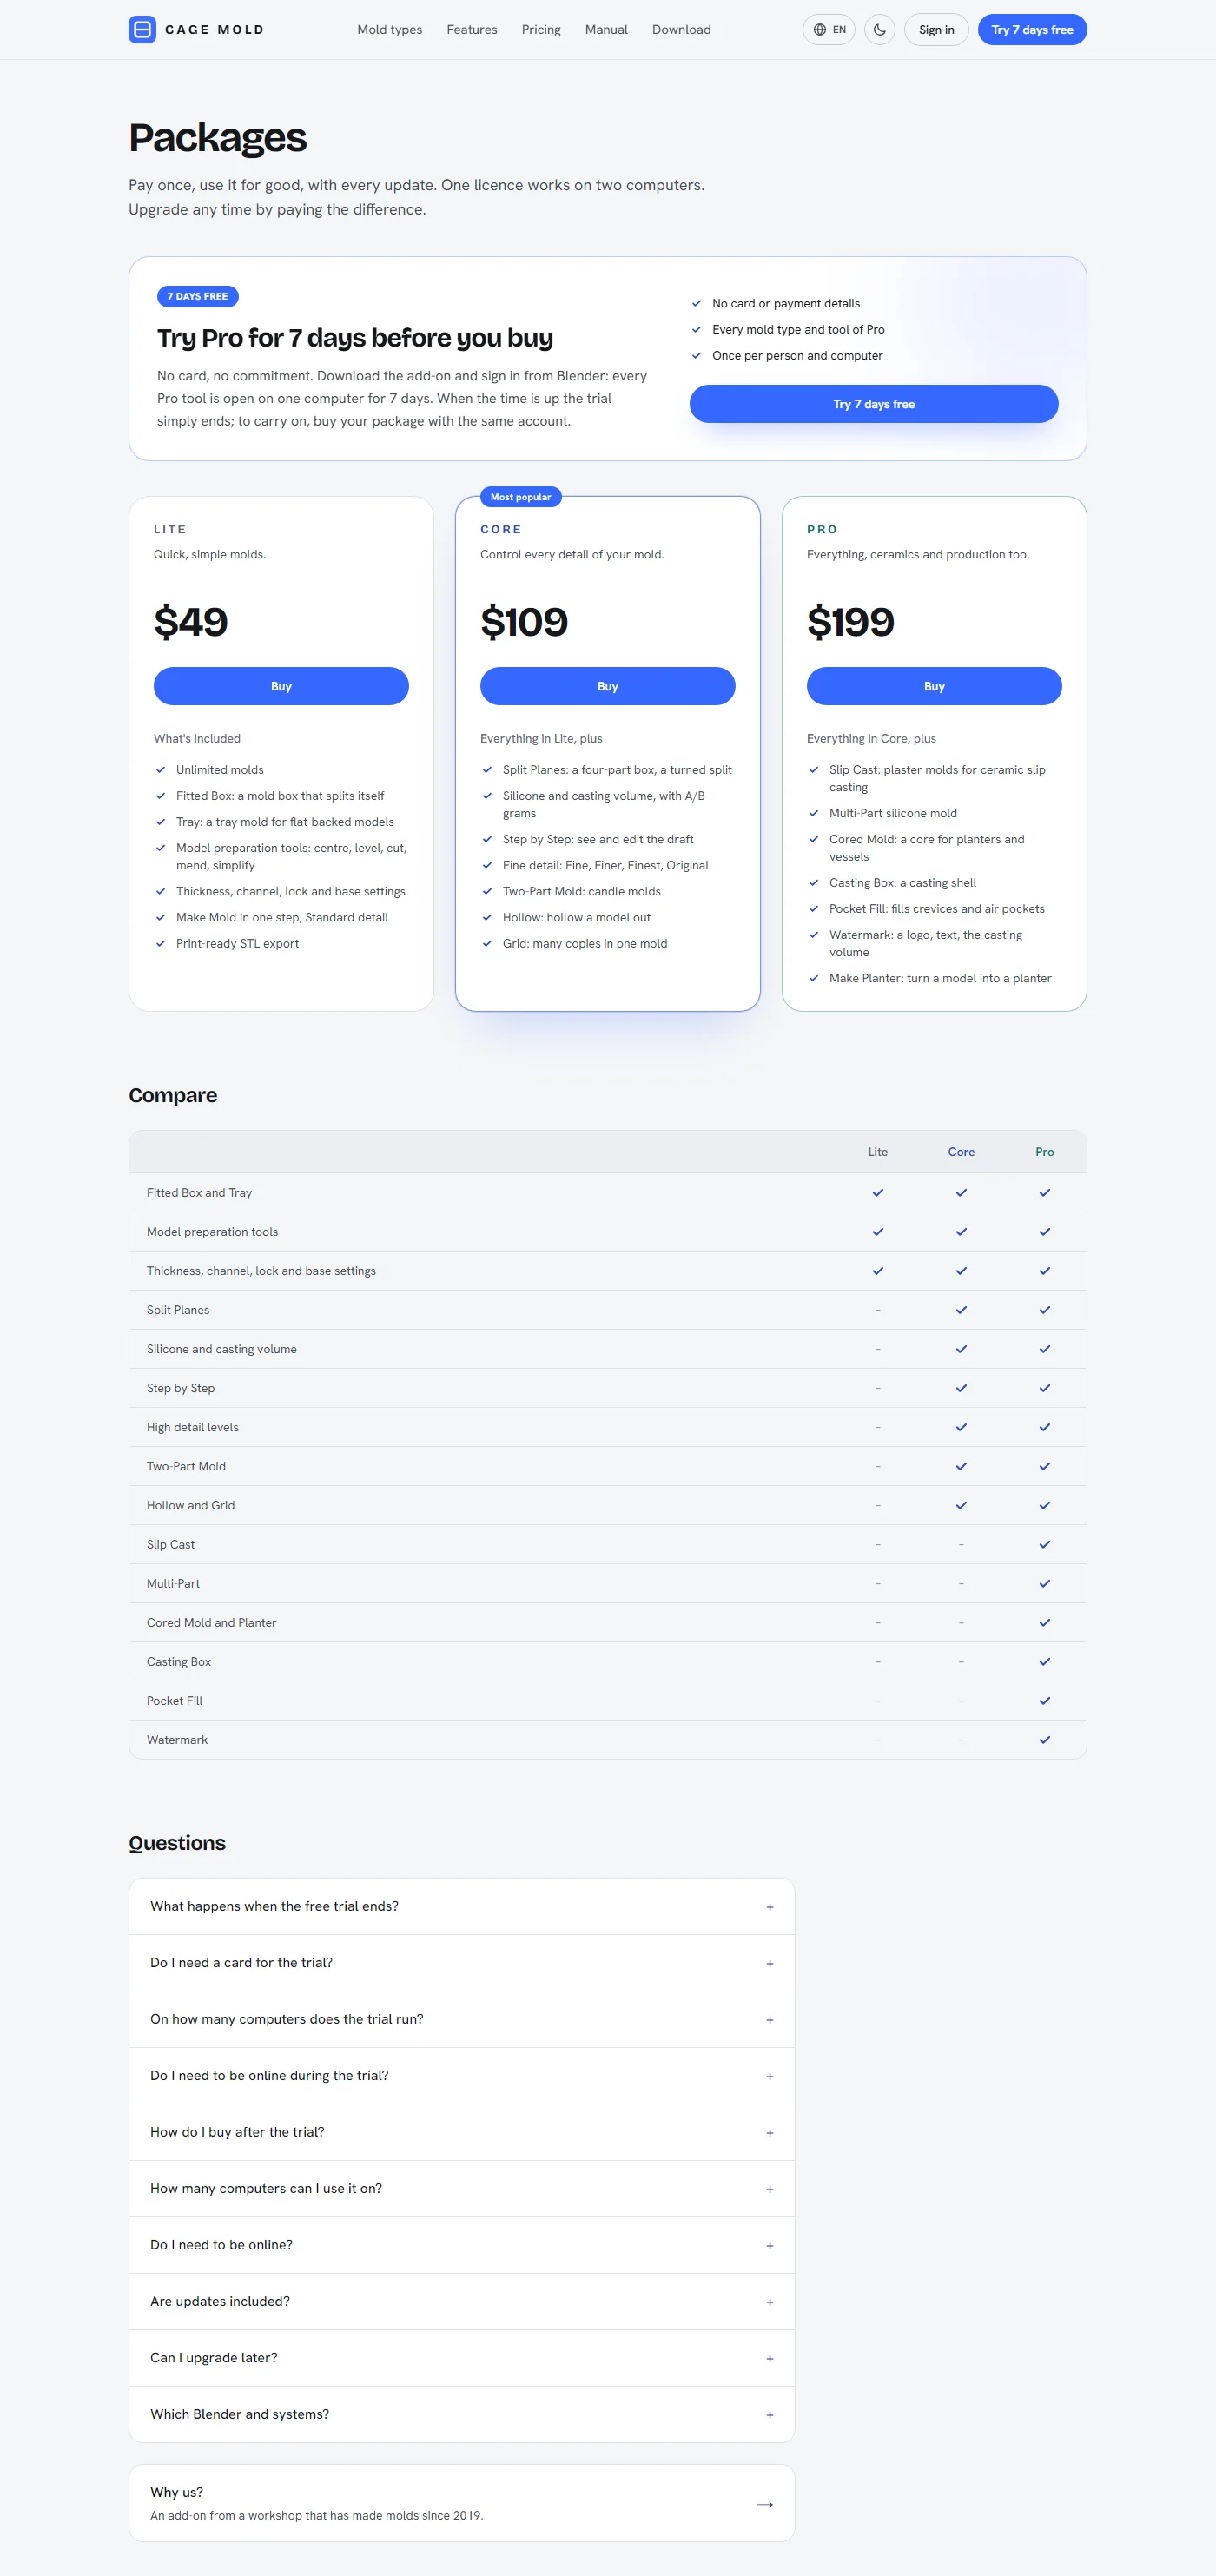
The packages page: the 7-day Pro trial on top, the three packages below. - Sign in with an e-mail code
Press the package's Buy button and the site asks you to sign in first. There is no password: type your e-mail address, press Send the code and type the 8-digit code from the e-mail. The code works once, for 15 minutes; if it does not arrive, look in your spam folder. The first sign-in opens your account by itself.
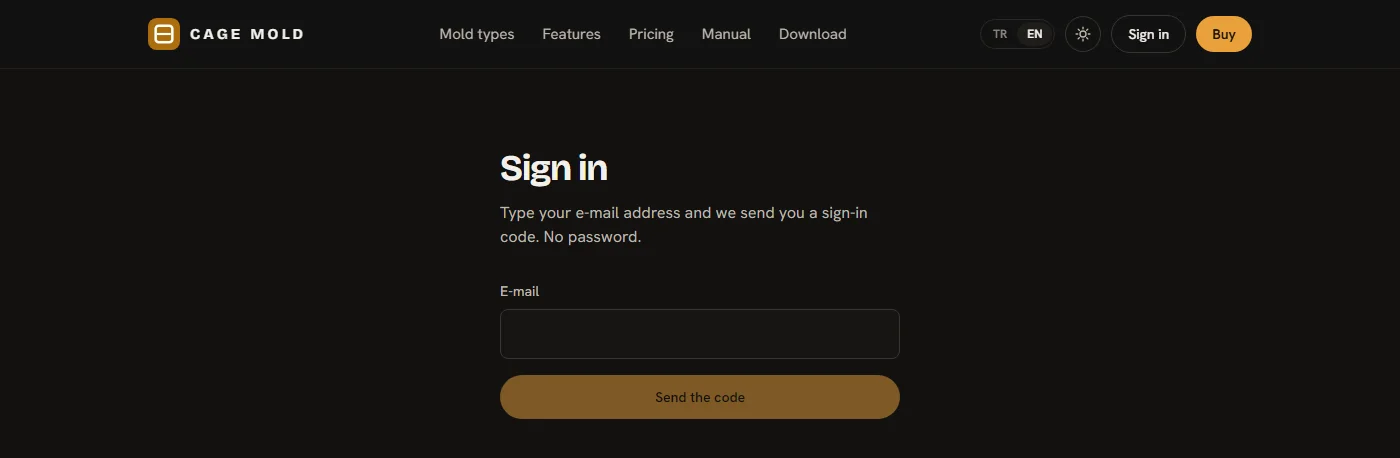
The site's sign-in page: the e-mail, then the code. - Pay
On the checkout page write your first and last name and accept the terms and the distance sales contract; enter a discount code if you have one. You type your card into PayTR's secure form; it never reaches us. As soon as the payment is through, the licence is added to your account and a receipt comes to your e-mail.
- My account
The My account page shows your package, your connected computers (at most 2), your orders and your support requests. The Cage Mold program's download button and the Blender add-on buttons, which install the extension in Blender, are here too (the next step).
2. On Windows: install the Cage Mold program
On Windows the easiest way is the program: one folder, Blender included. There is no Blender to install and no repository to add; open the program and Cage Mold opens. If you already use Blender, or you are on a Mac or Linux, add the extension to your own Blender instead (below). Both are the same Cage Mold: the same tools, the same licence. Using the program and the extension in your own Blender on one computer still counts as one computer on your licence. The program keeps its settings in its own folder and never touches your own Blender.
- Download the program
On your Windows computer open cagemold.com/download (or My account). In the Cage Mold program card at the top press Download for Windows. The file is named like
cage-mold-windows-1.4.0.zipand is about 290 MB; your browser saves it in your Downloads folder. On a Mac or Linux the page does not show this card and offers only the extension.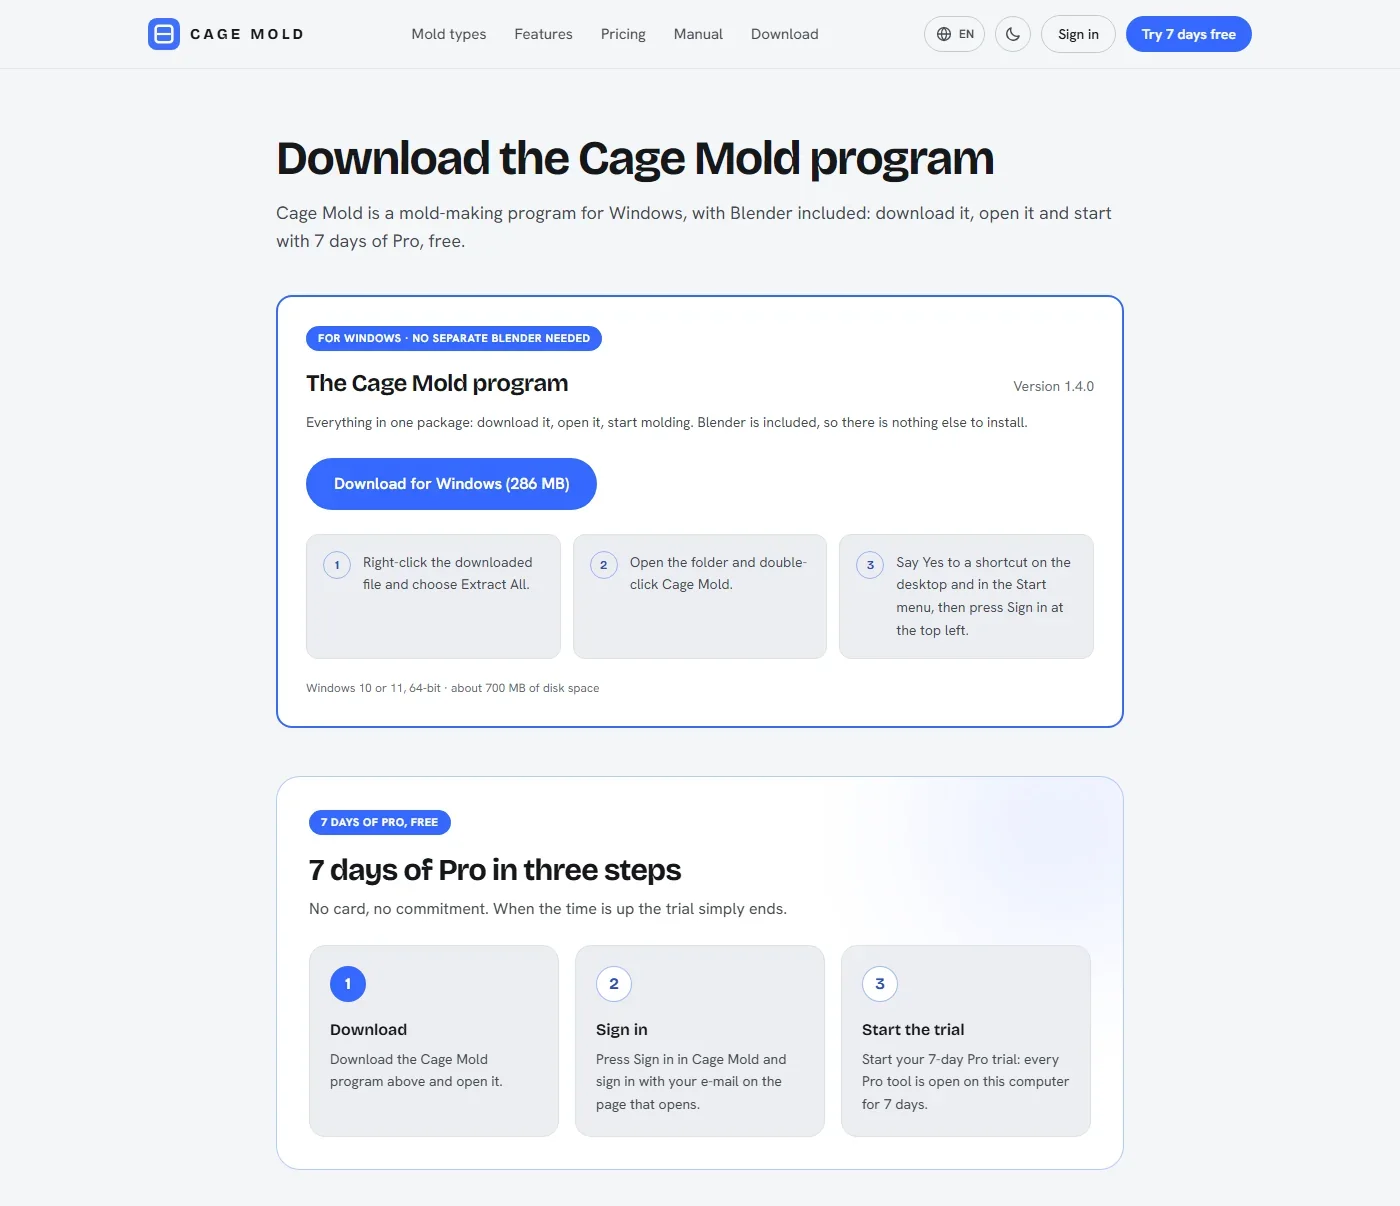
The download page on Windows: the Cage Mold program and its Download for Windows button on top, the trial's three steps under it. - Extract the zip into a folder
Right-click the downloaded file and choose Extract All…. Pick one of your own folders, for example Documents or a folder on a D: drive. The program writes its settings and updates into its own folder, so do not put it in
Program Filesor on a Desktop that OneDrive syncs. Do not double-click inside the zip: extract it first. - Open Cage Mold
In the extracted folder open the Cage Mold folder and double-click Cage Mold (
Cage Mold.exe). The program opens straight in Cage mode; Blender's first-start questions do not come, and internet access is already on. While it starts, Blender's icon may show on the taskbar for a few seconds before Cage Mold's takes its place. The program has no Blender mode: the tools are always on screen. - Shortcuts: Yes
On the first start the program asks once: "Put Cage Mold on the desktop and in the Start menu?" Press Yes; from then on you open Cage Mold from the desktop or the Start menu. If you say No it does not ask again; you can add the shortcuts later with Create shortcut in the extension's preferences. If you later move or rename the folder, the next start offers to renew the shortcuts.
- Sign in
Press Sign in at the top of the Cage Mold tab and carry on with step 3; signing in, the trial and buying work in the program as in the extension. Automatic updates are on from the start in the program: there is no need to press Check for updates automatically.
2. If you use Blender: install the extension in Blender
On a Mac and on Linux, and on Windows if you want to use your own Blender, you install Cage Mold as an extension. Installing goes through Blender's own extension system: you drag a button from the website into a Blender window, Blender adds the Cage Mold repository and installs the extension from it. New versions then come the same way, as updates in Blender. All the windows below are Blender's own; the screenshots are from Blender 5.0.1.
- Open Blender
Open Blender 5.0 or newer and close the splash with a click. No file needs to be open. On Blender's very first start it asks for internet access: choose Allow Online Access (it can also be turned on later in Edit › Preferences › System › Network).
- Drag the button into Blender
Open cagemold.com/download (or My account) in your browser. Hold the Drag into Blender button of your computer with the left mouse button, drag it over the open Blender window and let go. Putting the browser and Blender side by side on the screen makes this easy. The buttons are in the Blender add-on card: on Windows at the foot of the page, opened by the line "Already use Blender?"; on a Mac and on Linux at the top of the page.
- On the first drop: Add Repository…
Blender says the repository is not known yet ("The dropped extension comes from an unknown repository"). Check that the address in the window is
cagemold.com/blender/index.jsonand press Add Repository….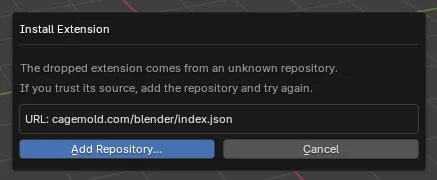
The first drop: Blender offers to add the repository. - Create the repository
Blender's Add New Extension Repository window opens with the URL filled in. Press Create without touching anything else. Requires Access Token and Secret stay empty; the Cage Mold repository is public and asks for no key. You do not need to tick Check for Updates on Startup here; the extension turns it on with one click later (step 6).
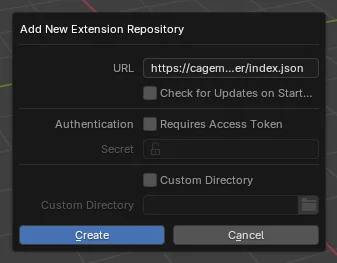
Add New Extension Repository: the address is ready; Create. - Drag the button again and install
Drag the same button into Blender once more. Blender reads the repository and asks: "Do you want to install the following add-on?" Check that the name is Cage Mold and the repository cagemold.com (Blender names the repository after its address); leave Enable Add-on ticked and press OK. The extension downloads, installs and turns on in a few seconds.
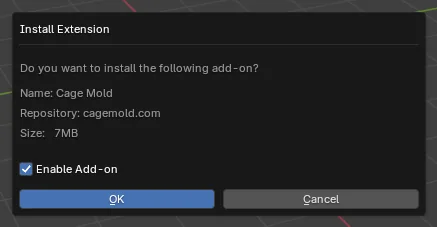
The second drop: Blender asks to install the extension from the repository. - Open the tab and turn on automatic updates
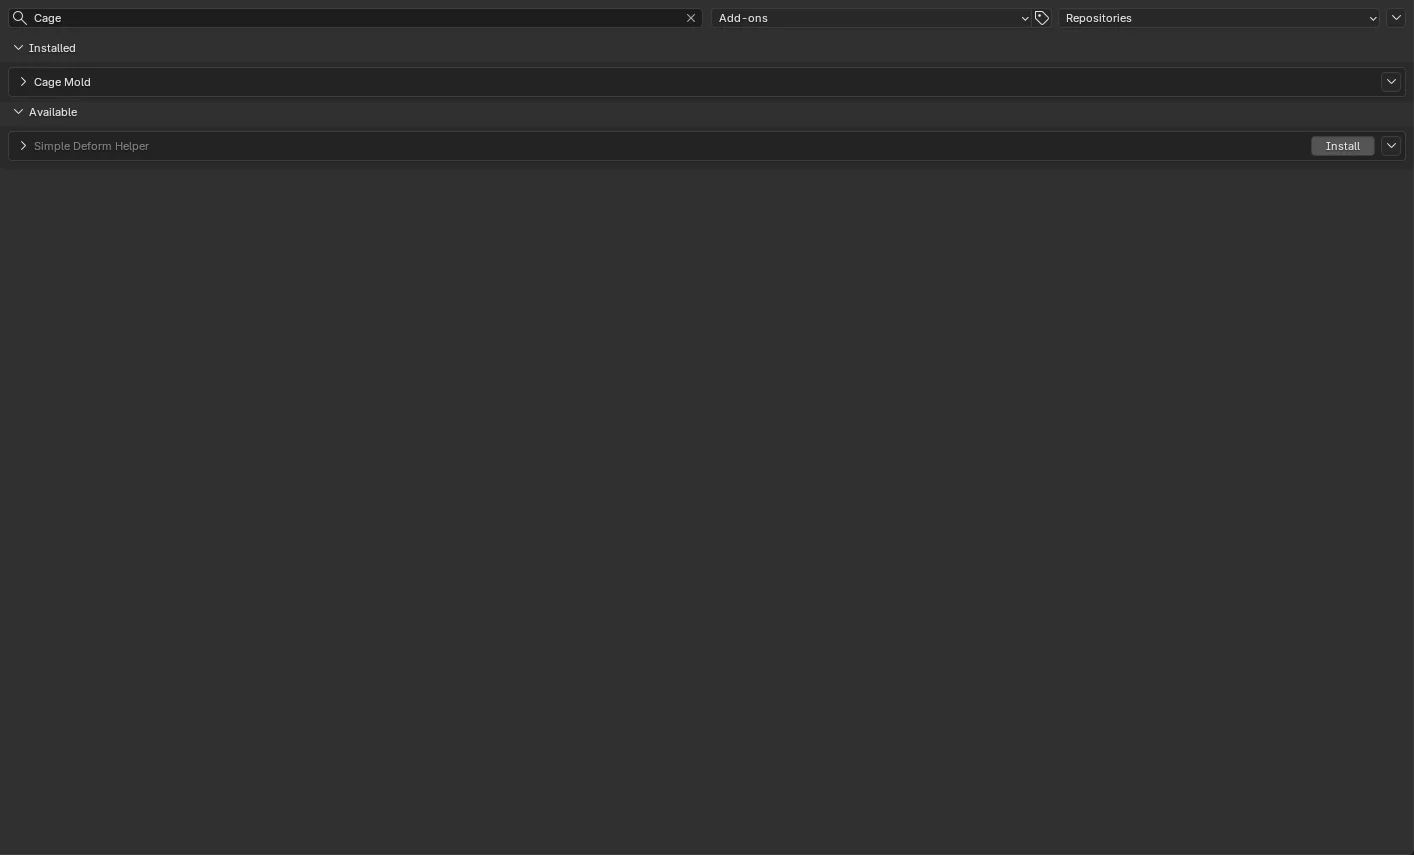
With the mouse over the 3D view press N: the sidebar opens on the right. Choose Cage Mold among the vertical tabs at the sidebar's right edge. At the top of the tab there are two boxes:
- Account (on top): "Sign in to use Cage Mold" and the Sign in button. That is the next step.
- Under it "New versions are not checked for" with Check for updates automatically: press it once. From then on Blender looks for new versions by itself (Updates). The box goes away.
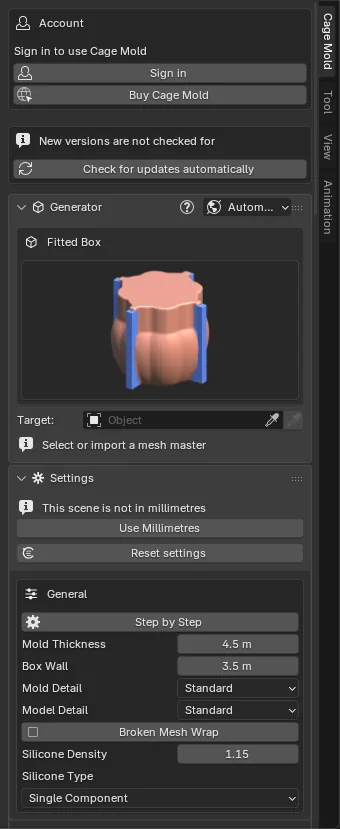
The tab right after installing: the updates box and the sign-in. 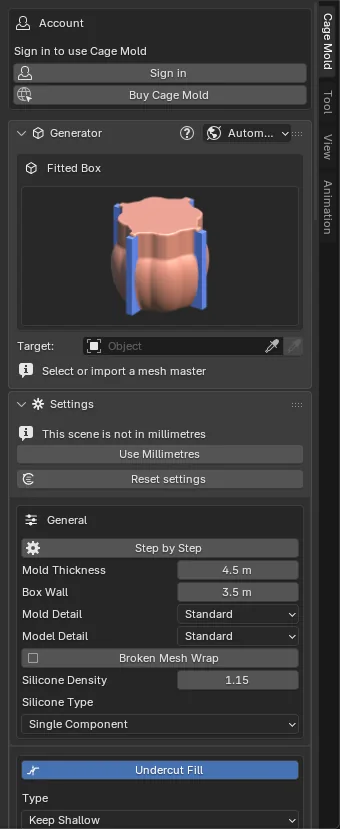
After Check for updates automatically: only the sign-in is left.
3. Sign in from Blender and connect the computer
Cage Mold builds molds with its mold engine. The engine does not come with the program or the extension: when you sign in, this computer is connected to your licence and the engine of Cage Mold's own version downloads by itself. You do this once on each computer.
- Sign in
Press Sign in at the top of the Cage Mold tab. Your browser opens the
cagemold.com/activatepage; the Account box in Blender says "Confirm this code in the browser:" and shows a code in capitals (for exampleKXTP-MRQD). If the browser did not open, press Open the page again.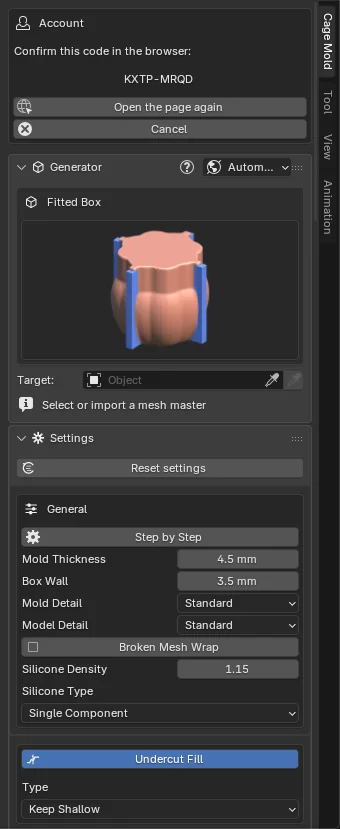
Blender shows the code and waits for the browser. - In the browser: Connect this computer
If you are not signed in on the site, sign in with the e-mail code first (as above). Check that the code on the page is the same as the one in Blender; the page shows your computer's name and the licence it will use. Press Connect this computer. If the code is not yours, press This is not me; the code then works nowhere. A code is valid for 10 minutes. If your account holds no valid licence yet, the page offers the 7-day Pro trial in place of the connect button, or says why it cannot (below).
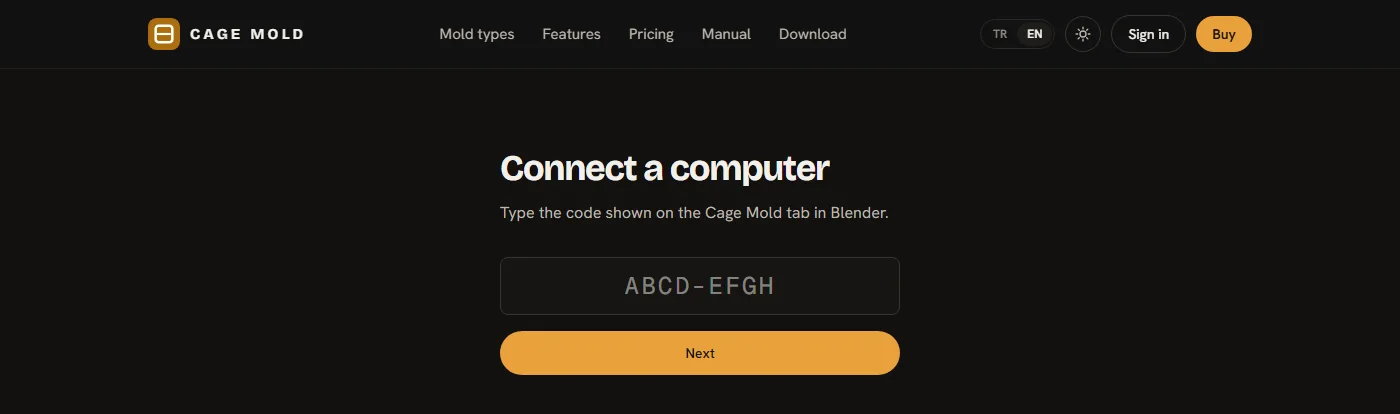
The Connect a computer page. Coming from Blender, the code is filled in. - Back in Blender: the engine downloads
When the page says "Connected", go back to Blender. The Account box says "Downloading the engine…"; the engine (a few MB) arrives in a second or two. Then the Account box leaves the tab and the Generator panel moves to the top: Cage Mold is ready. Your account's details are now in the Account box of the extension's preferences (below).
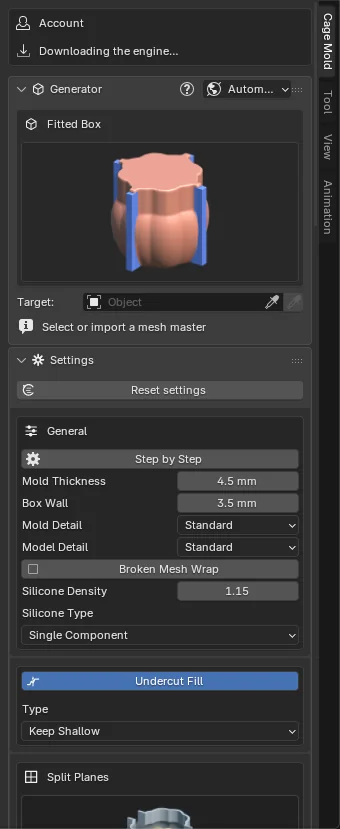
The sign-in is confirmed; the engine downloads.
The 7-day Pro trial
Before you buy, you can try the Pro package free for 7 days: every Pro mold type and tool is open. No card or payment details are asked for; when the time is up the trial simply ends and nothing is charged.
- 7 days: 168 hours from the moment you start it.
- One computer: the trial works only on the computer you start it on. Two computers belong to a bought licence.
- Once: each person and each computer gets one trial. A trial does not start in a virtual machine.
- Online: during the trial the extension checks the licence with cagemold.com for every mold. Blender's Allow Online Access must be on and the computer online; a trial does not work without the internet. Your model still never leaves your computer.
- Cage Mold 1.2.0 or newer: on an older version, press Update first (Updates).
- Install and sign in
Install Cage Mold: the program on Windows (step 2) or the extension in Blender (step 2); then press Sign in on the Cage Mold tab. Your browser opens
cagemold.com/activate; if you are not signed in on the site, sign in with the e-mail code (step 3). The trial belongs to the e-mail address you sign in with. - In the browser: Start your 7-day Pro trial
If your account holds no licence yet, the page shows the box "Start with 7 days of Pro" under the computer to connect, with the day and hour the trial would end ("Ends …"). Check that the code on the page is the same as in Blender and press Start your 7-day Pro trial. The trial starts and the computer connects at the same time: the page says "Your Pro trial has started" and gives the end again. To buy a package straight away instead, Or buy a package now under the box opens the packages.
- Back in Blender
The engine arrives in a few seconds. Unlike with a bought licence, the Account box at the top of the tab stays: it shows the time left ("Pro trial: 7 days left") and a Buy Cage Mold button. The time counts down in days; in the last two days it shows hours ("Pro trial: 30 hours left"), and in the last hour "Pro trial: less than an hour left". In the extension's preferences the Account box shows the package as Trial, the computers as 1 of 1, and the trial's end in place of Works offline until …: The trial ends …
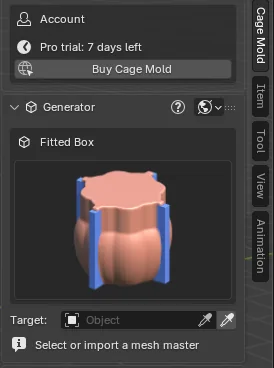
The top of the tab during a trial: the time left and Buy Cage Mold.
Buying: during the trial or after it
You buy the package on the website with the same e-mail address you started the trial with; you can buy before the trial ends too. The trial does not count as a package: you buy the package you want (Lite, Core or Pro) at its full price. Your computer moves to the bought licence without a new sign-in: by itself within an hour, since a trial's licence renews every hour, or at once when you press Refresh licence in the Account box of the extension's preferences. From then on the licence works on two computers and 14 days without a connection. If you bought a smaller package than Pro, what it does not include is locked (below).
When the trial ends
After the end no mold is built; Cage Mold says "Your 7-day Pro trial has ended: choose your package". Within an hour if Blender is open, or at its next start, this computer is signed out: the Account box on the tab reads "Your 7-day Pro trial has ended: choose your package, then sign in again" and shows Sign in and Buy Cage Mold. Buy your package with the same e-mail address, then press Sign in: the computer connects to the licence you bought.
The molds you built during the trial are ordinary Blender objects: they still open and export after the trial.
If the trial does not start
When the page cannot offer or start a trial, it says why in one line and shows the See the packages link:
| What the page says | What to do |
|---|---|
| This account has had its trial. | Each person gets one trial. To carry on, buy a package. |
| This computer has had a trial. | Each computer gets one trial; another account does not start a new one either. Buy a package. |
| A trial runs on one computer, and it is in use on another. Buy a package for two computers. | You signed in on a second computer while the trial runs. Carry on on the computer you started it on, or buy a package. |
| A trial does not start in a virtual machine. A bought licence works there. | Start the trial on your own computer, or buy a package. |
| This computer cannot be told apart for a trial. A bought licence works on it. | No trial starts on this computer; buy a package. |
| A trial needs a lasting e-mail address, not a throwaway one. Sign in with another address. | Throwaway e-mail addresses start no trial. Press Sign out on My account, then press Sign in in Blender again and sign in with your lasting address. |
| Too many trials started from this network lately. | Other trials were started from this network lately. Buying a package lets you start at once. |
| Update Cage Mold in Blender (1.2.0 or newer) to start a trial: Update in Get Extensions. | Update the extension (Updates), then Sign in again. |
| Trials are paused for now. | Trials are stopped for a while; meanwhile the page does not show the trial at all. Press Sign in in Blender again later, or buy a package. |
| Your account already holds a licence. | Press Sign in in Blender again; the page then offers to connect the computer with your licence. |
| Pressed too often. Wait a little and try again. | Wait a minute, then press Sign in in Blender again. |
| The trial could not start. Try again in a minute. | Press Sign in in Blender again in a minute; if it goes on, write to support. |
The account, computers and signing out
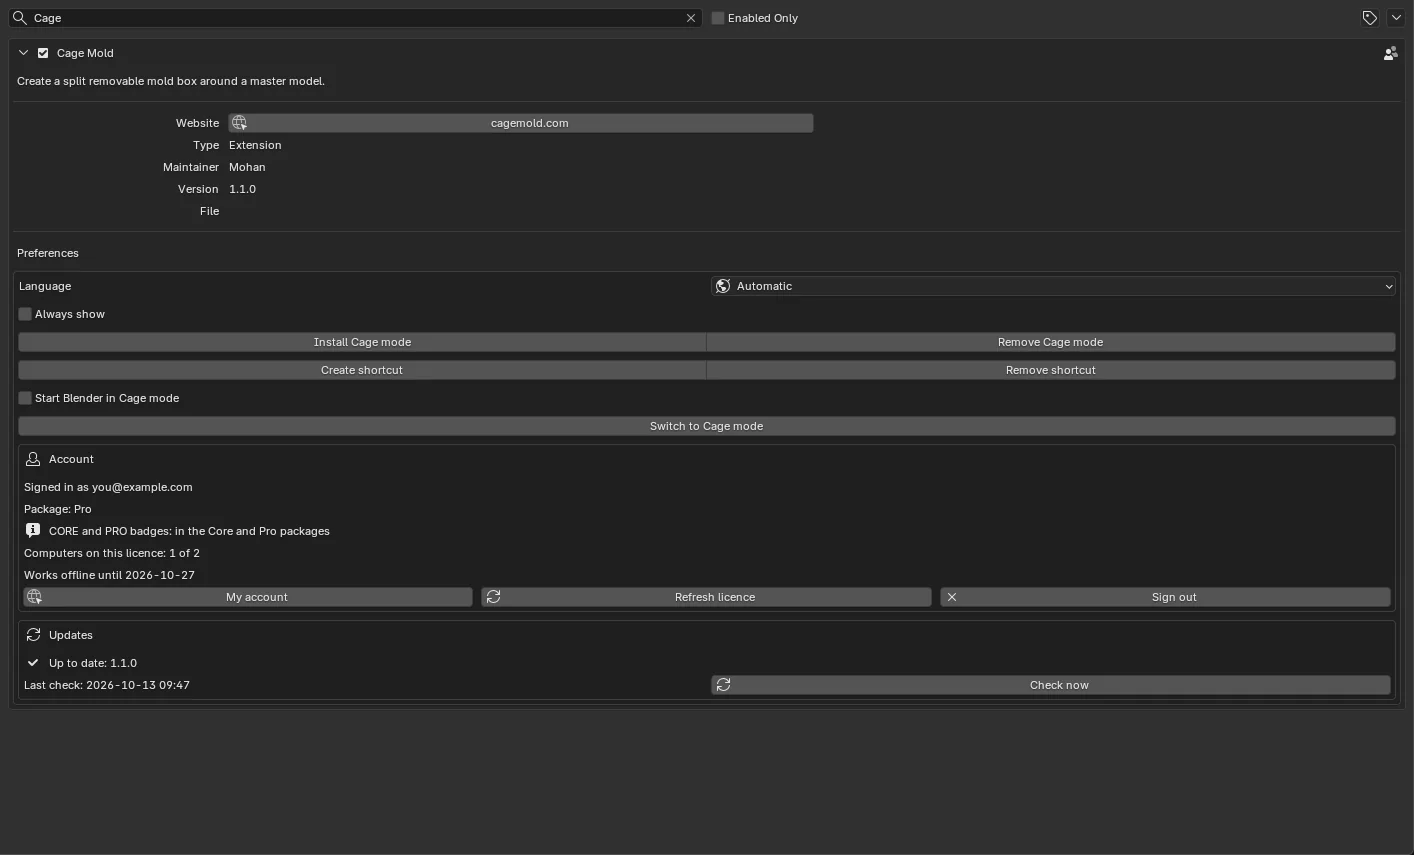
The Account box under Edit › Preferences › Add-ons › Cage Mold shows:
- Signed in as …: the e-mail you signed in with.
- Package: Lite, Core or Pro (Trial during a trial); under it what the badges mean (CORE and PRO badges).
- Computers on this licence: 1 of 2: how many computers your licence is connected to (1 of 1 on a trial).
- Works offline until …: the last day it works without the internet. Every time the computer goes online this date moves on by itself. A trial does not work offline, so this row gives the trial's end instead: The trial ends …
- My account opens the website, Refresh licence renews the licence now (after an upgrade), Sign out signs this computer out.
Two computers. One licence opens on two computers. Signing in on a third, the site says so; on My account you take the old computer off with Remove and connect the new one. Or press Sign out in Blender on the old computer: the seat is free at once.
Upgrading. Choose the higher package on the site and pay the difference; then press Refresh licence in Blender. The locks lift at once.
Working offline. A bought licence renews silently every day. A computer that stays offline for 14 days builds no new molds; once it is online again it carries on by itself. The 7-day trial does not work offline at all (above).
What your package does not include
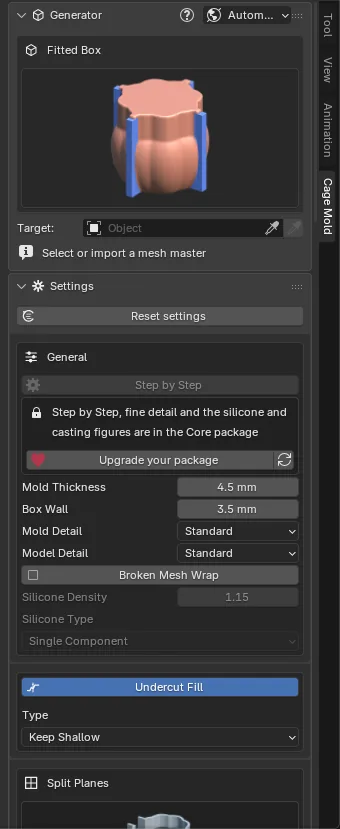
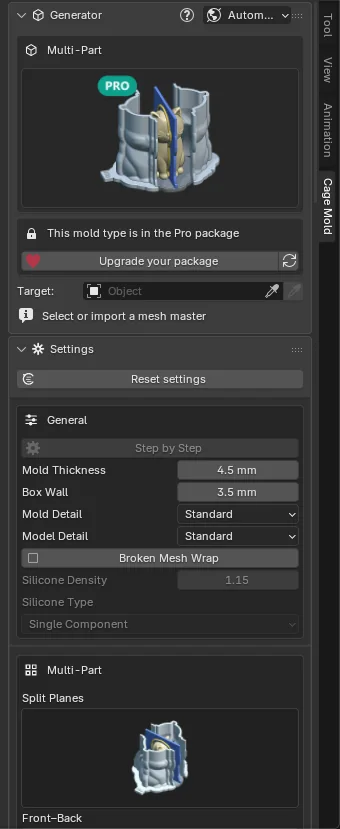
Where the sidebar reaches something your package does not include, a lock box appears: it says which package holds it, Upgrade your package opens the packages on the site and the refresh button beside it renews the licence. On a Lite computer, for example, Step by Step is locked, and choosing Multi-Part in the Generator brings that type's own lock. Before you sign in, no lock shows: your package is not known yet, and the tab only asks you to sign in.
Language
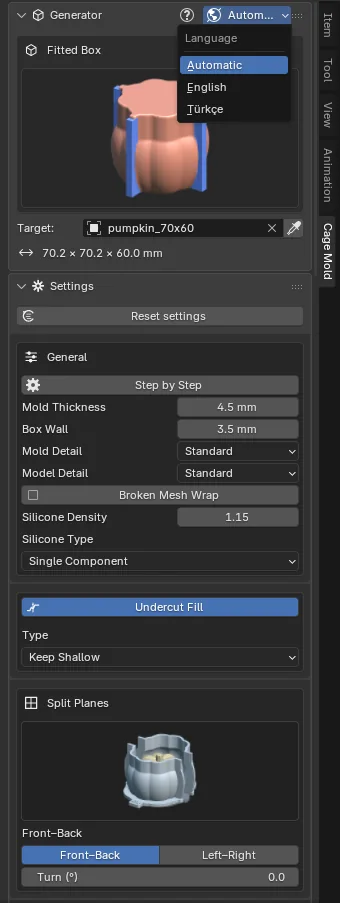
Cage Mold's interface comes in English and Turkish. The chooser is in two places: the globe in the header of the Generator panel in the sidebar (in tab mode and Cage mode alike; in a narrow sidebar only the globe shows) and the Language row in the extension's preferences.
- Automatic (default): follows Blender's own language. A Blender set to Turkish shows the extension in Turkish, any other language shows English.
- English, Türkçe: the extension shows that language whatever Blender's is. You can keep Blender in English and see the extension in Turkish.
The choice takes effect at once and in every window: panel names, options, buttons, the action card, the tool cards, dialogs and messages change. Blender's own menus and windows (the install windows too) keep Blender's language; object names (box_part_01 and the like) and exported file names are the same in every language. The choice is kept in the extension's own user folder, for every scene and both modes.
The screenshots in this manual show the English interface and the settings are named in English; in the Turkish interface they stand in the same places in the same order.
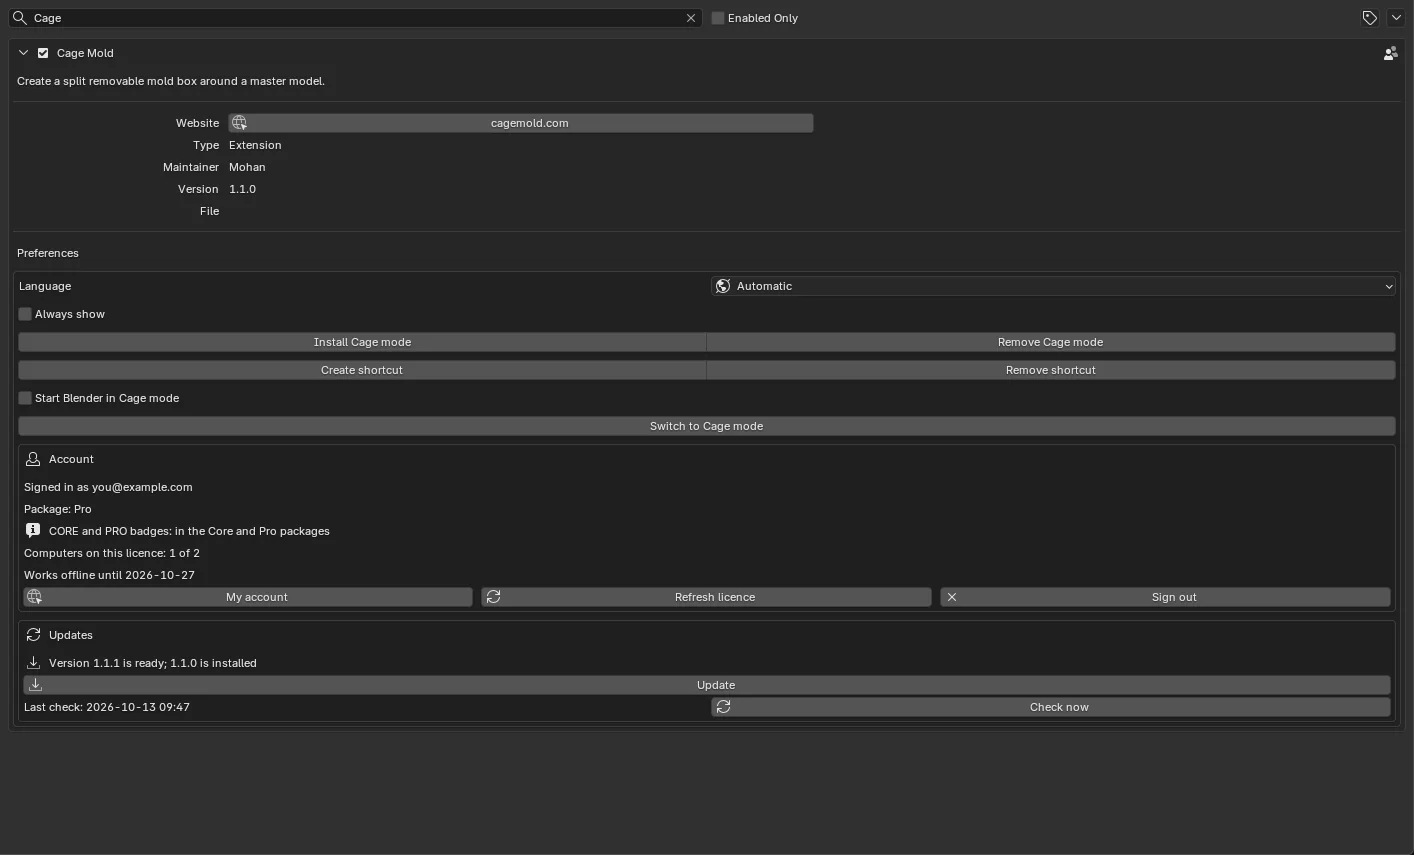
Cage Mold preferences
In Edit › Preferences › Add-ons open the arrow of the Cage Mold row. The options there:
- Silicone price per kg, Filament price per kg, Currency: your own prices for what a mold costs; empty at first (chapter 8).
- Filament Density (1.24 g/cm³, PLA's): the parts' grams on the mold sheet are worked out with it.
- Print Bed (256 × 256 × 256 mm): the width, depth and height your printer can print. A part that fits no way round is marked red on the mold sheet (chapter 9).
- Language: Cage Mold's language, Automatic / English / Türkçe (above).
- Always show: draws Cage Mold's strip, cards and action card in every 3D view whatever sidebar tab is selected. Off by default; they show only while the extension's tab is open.
- Install Cage mode / Remove Cage mode: installs or removes the Cage mode template, which hides Blender's menus.
- Create shortcut / Remove shortcut: adds or deletes a shortcut on the desktop and in the Start menu (in Applications on macOS) that opens Blender straight in Cage mode.
- Start Blender in Cage mode: when ticked, a Blender started without a file switches to Cage mode.
- Switch to Cage mode: switches now (it asks first when there are unsaved changes).
- The Account box: your account and this computer (above).
- The Updates box: the version, the last check and Check now (below).
Updates
You need do nothing to look for new versions: once you have pressed Check for updates automatically (step 6 of the install), Blender looks a minute after it starts and every half hour after that. In the Windows program this is on from the start.
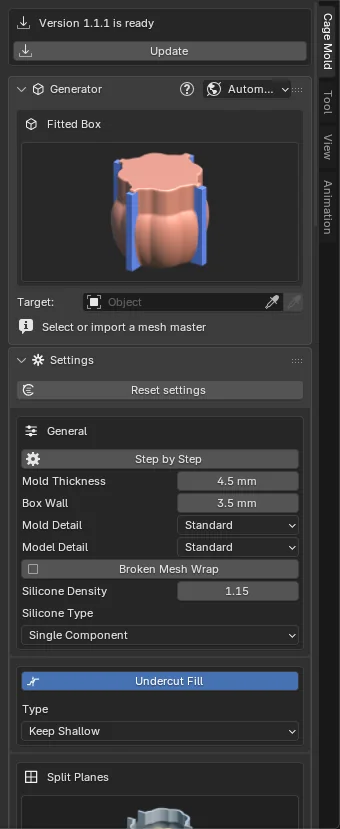
When a newer version is found, a row "Version X is ready" with an Update button appears at the top of the Cage Mold tab. The same row is in the Updates box of the extension's preferences. Update installs the new version at once: the extension is turned off and the new one on; Blender need not be restarted. The new version's engine downloads by itself too. While a mold is being built the button is inactive; it comes back when the job ends.
The Updates box shows the state: "Up to date: 1.0.0" or "Version X is ready", the date and time of the last check (Last check) and a Check now button that looks at once instead of waiting for the half hour.
An update does not disturb your work: your settings live in the scene, your language and account in the extension's user folder. If you use Cage mode, its template is brought up to date as well. In the Windows program these updates leave Blender itself as it is; a new Blender comes with a new program.
Removing
- To take this computer off your licence, press Sign out in the preferences first; the seat is freed.
- Uninstall from the menu in the extension's row in the Get Extensions or Add-ons tab. The mold engine and this computer's sign-in go with it.
- If you installed Cage mode, remove it first with Remove Cage mode and Remove shortcut in the preferences.
- The Windows program: Sign out first, then Remove shortcut in the preferences; then delete the Cage Mold folder. The program's settings, sign-in and engine are in that folder; your own Blender's settings are left alone.
- The mold parts in your scenes are ordinary Blender objects; they still open and export with the extension removed.