Skip to contentBlack Friday20% off Lite and Core, 35% off Pro · until 30 NovemberSee prices
CAGE MOLD

Features

See what you get

Every mold type and tool, with pictures of molds Cage Mold built itself: what it does, what you set, which package has it.

Mold types

Fitted Box

Lite

In every package. Split Planes, Step by Step, fine detail and the silicone figures are in Core; Casting Box and Watermark in Pro.

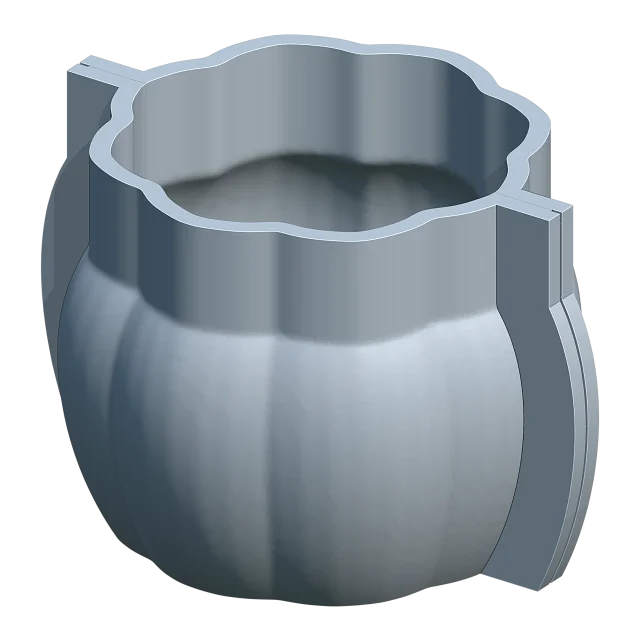
The printed box walls follow the model closely: silicone is poured between the model and the walls, with a base plate under them. The first choice for most models.

By default one vertical plane splits the box in two, and each part slides off its own way. Undercuts up to 1 mm stay, because the silicone flexes over them; deeper ones are filled.

  • Mold Thickness 4.5 mm: the least silicone round the model
  • Box Wall Thickness 3.5 mm; the base plate, channels and locks come ready
  • Make Mold builds it in one step; with Core's Step by Step you edit a draft first
  • With Core the card shows the silicone's grams and the casting volume, and the weight is printed on the mold's foot
  • Every part exports as its own STL
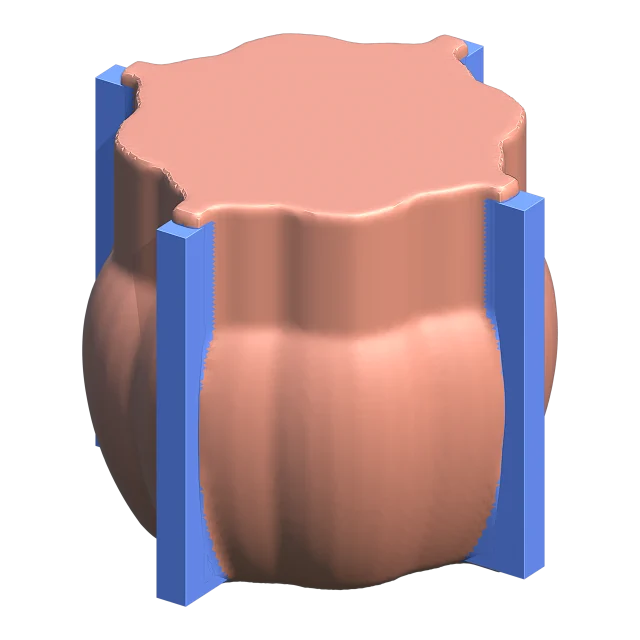
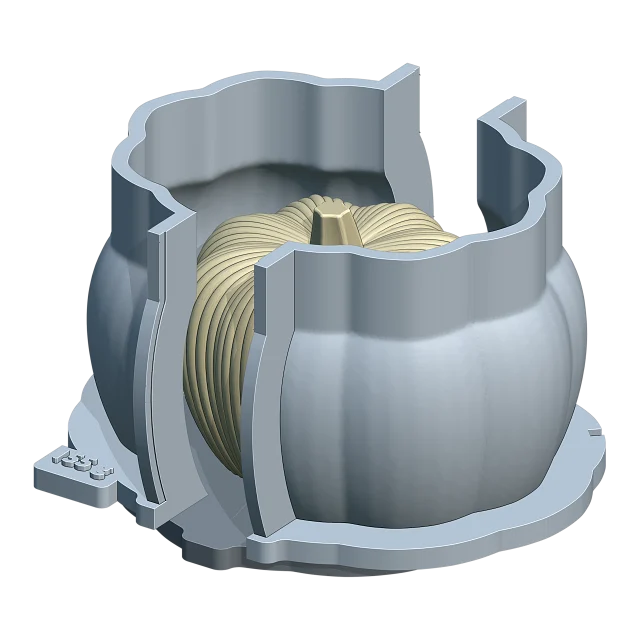
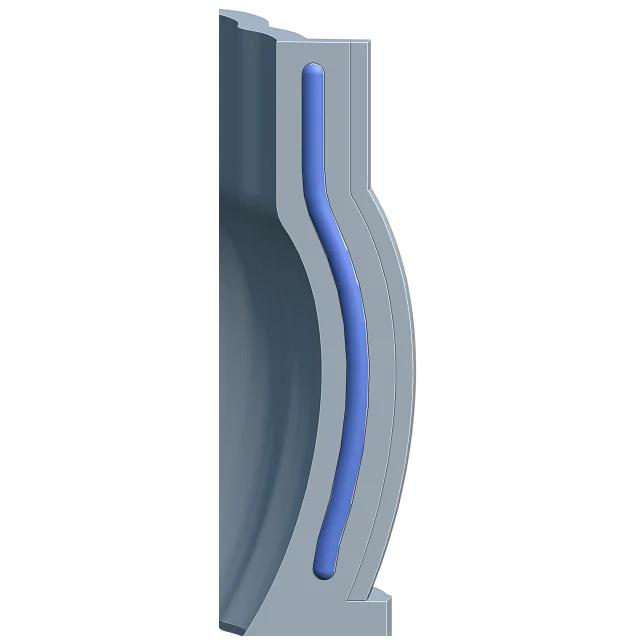
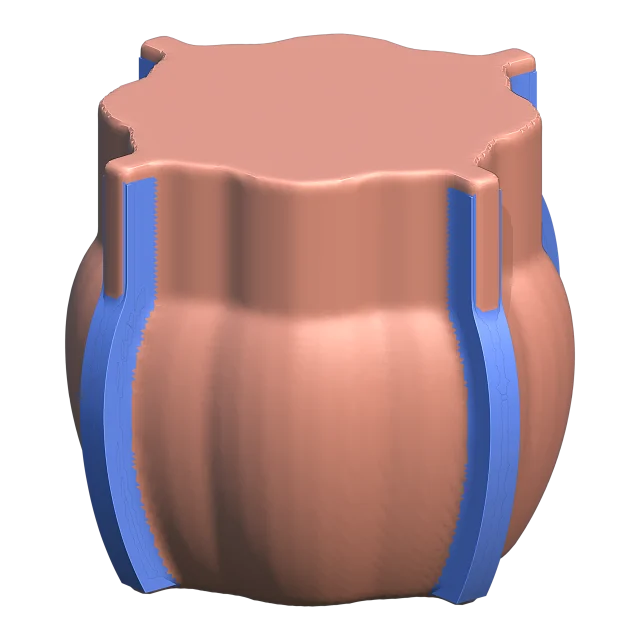
Fitted Box: Silicone round the pumpkin, with channel plates
Silicone round the pumpkin, with channel plates
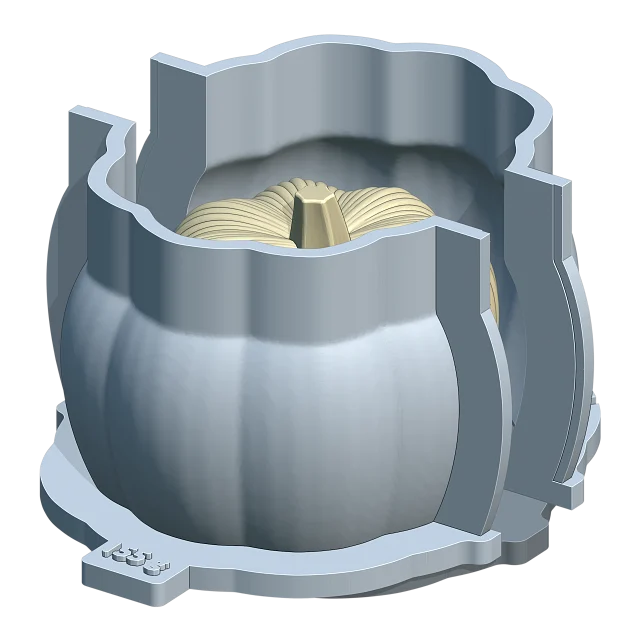
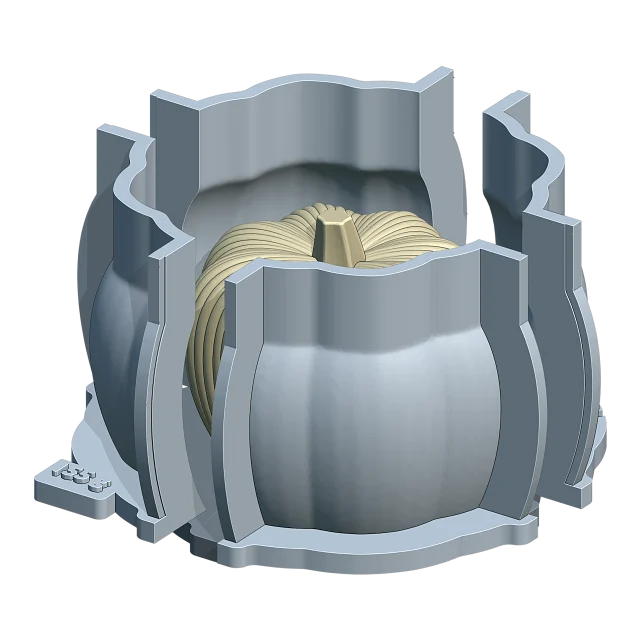
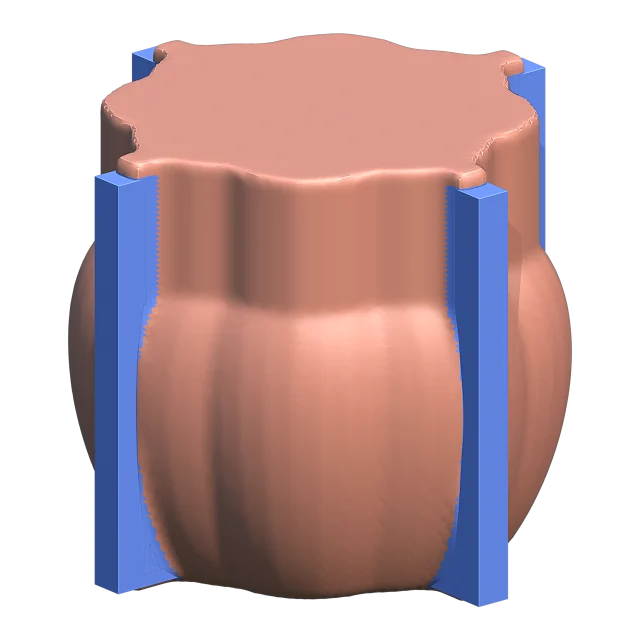
Fitted Box: Box parts drawn back from the base
Box parts drawn back from the base
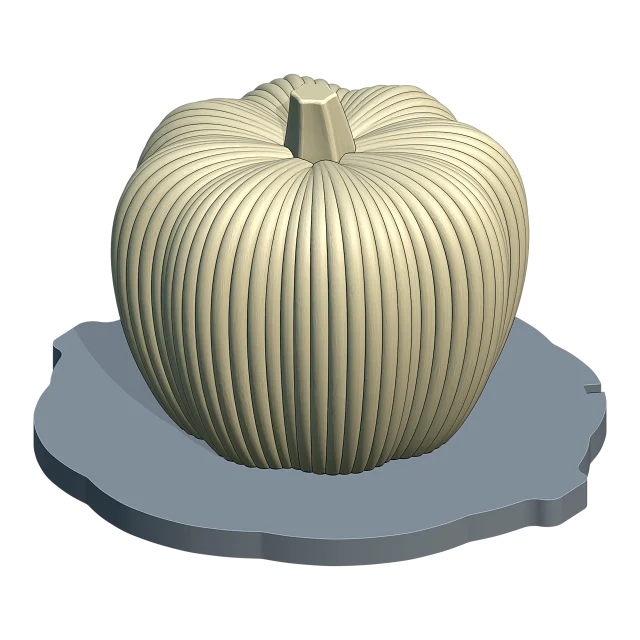
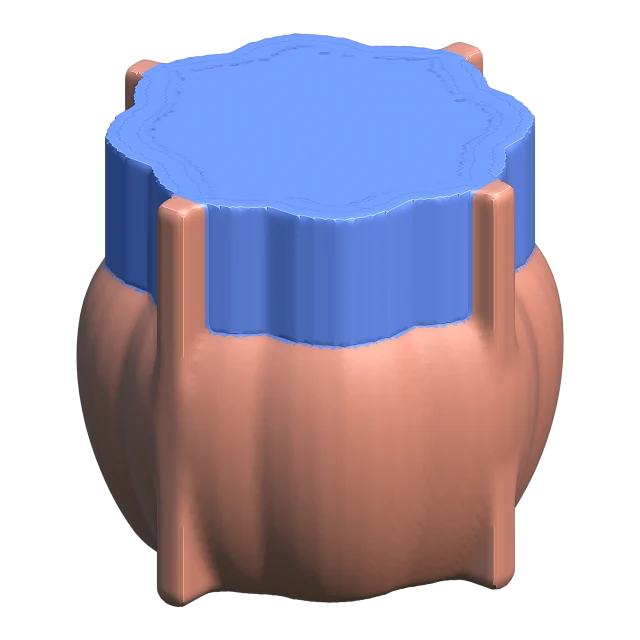
Fitted Box: The model and the base plate in one print
The model and the base plate in one print

Tray

Lite

In every package, with Grip and Model Pins. Casting Volume is in Core; the tray's Casting Box and Watermark in Pro.

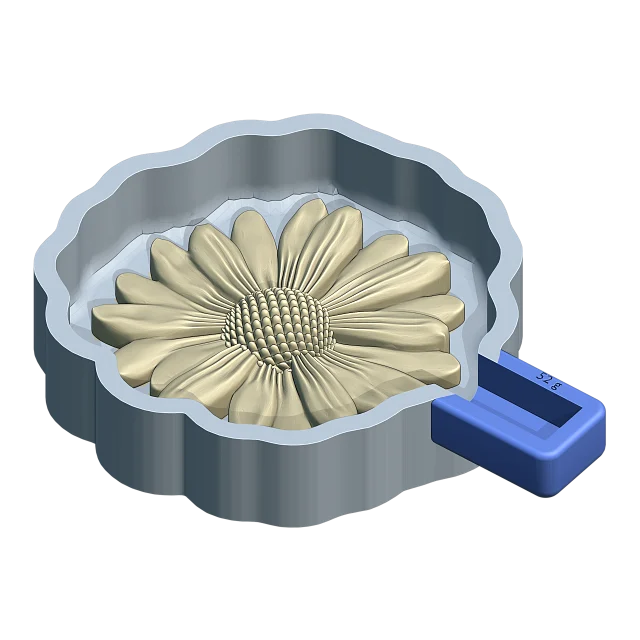
One printed pan with a flat floor. The model is fixed to the floor, silicone is poured over it, and the cured block lifts straight up.

The cavity only widens upward, so there are no undercuts and no trapped air. For flat-backed, simple models.

  • Optimized (wraps the model, leaves an island in its holes; the default) or Contour (covers the holes with silicone)
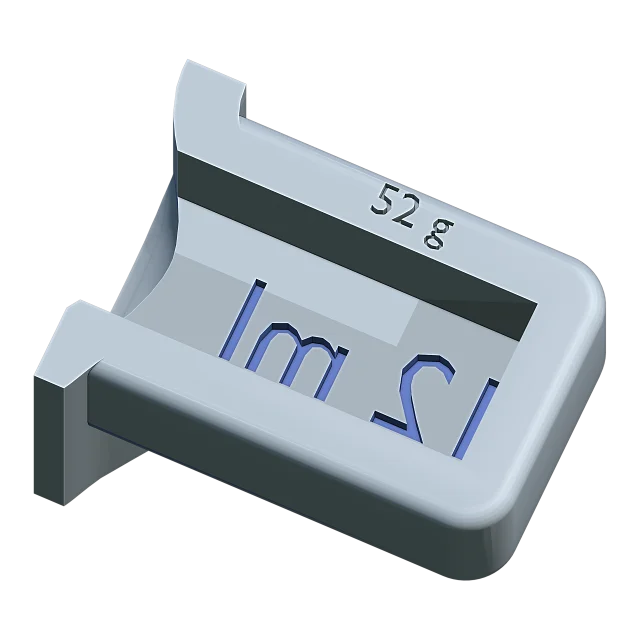
  • Grip: a 20 × 10 mm silicone handle cast in a side pocket
  • Casting Volume (Core): the casting's ml written mirrored in the pocket floor, reading right on the silicone
  • No splits, channels or funnel: one pour, one piece
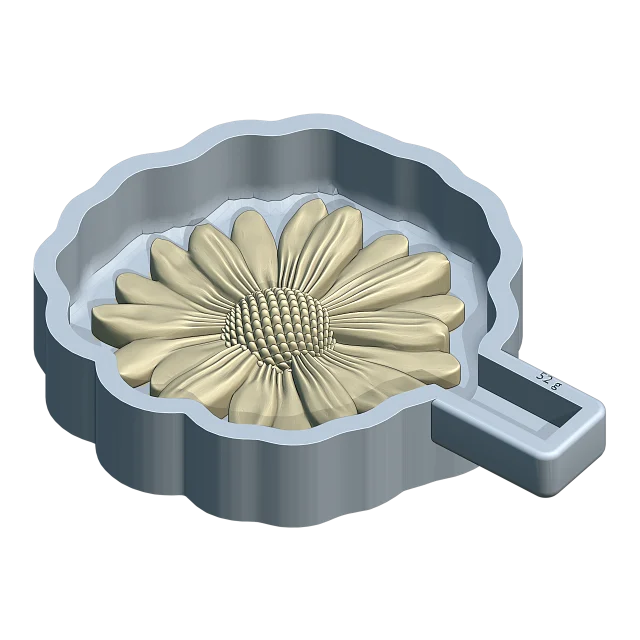
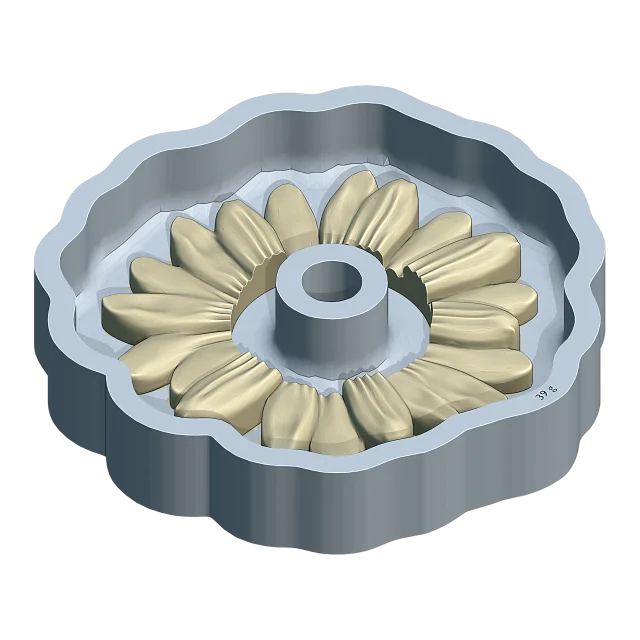
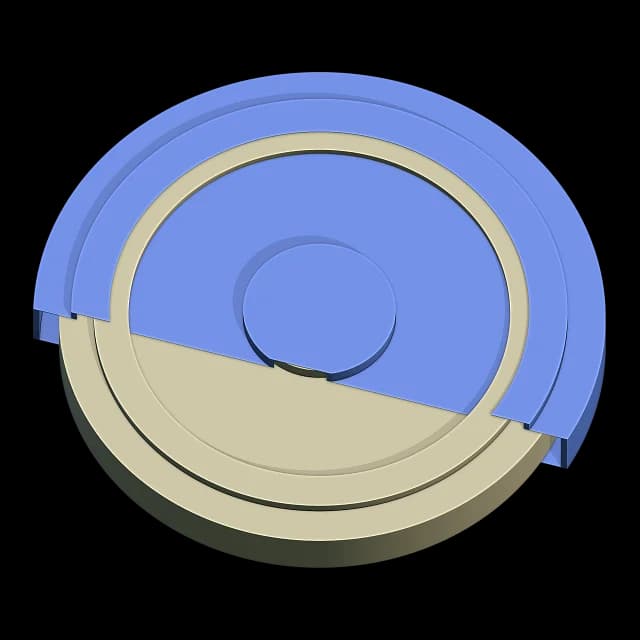
Tray: The tray: daisy fixed to the floor, grip pocket
The tray: daisy fixed to the floor, grip pocket
Tray: Optimized: an island in the daisy's window
Optimized: an island in the daisy's window
Tray: The grip pocket
The grip pocket
Tray: The casting volume in the grip pocket
The casting volume in the grip pocket

Two-Part Mold

Core

In Core and Pro. Its casting cage (Casting Box) is in Pro.

Two silicone halves that close on a vertical plane through the model's axis, each cast in its own printed box. For models closed all round, above all taper candles, several in one mold.

The wax goes in where each cavity opens at the model's base; the wick channel runs from each tip out through the mold.

  • Cavities: 1-8 in one row (2 by default)
  • Back: Flat, or Contoured following each cavity and cast under a lid (about a third less silicone)
  • Key Type: Barrier (long bars) or Pin (rows of studs), 5 mm
  • Open Bottom, a 15 mm Reservoir and a 1.5 mm Wick Channel
  • Mold Thickness 8 mm for this type
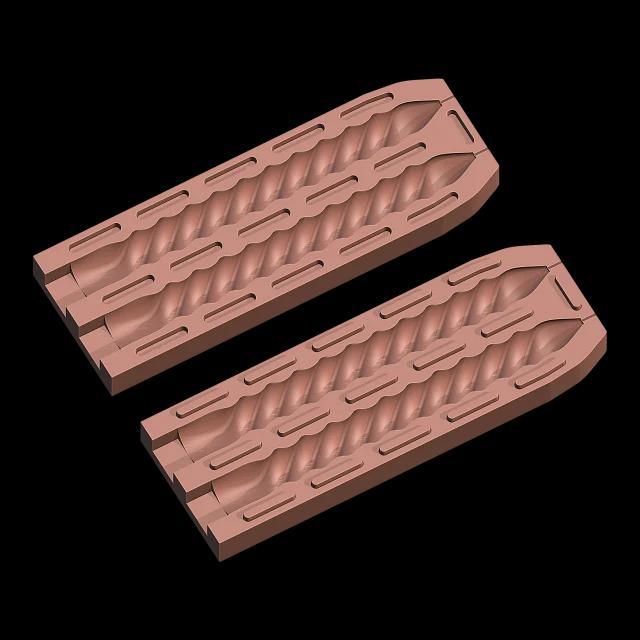
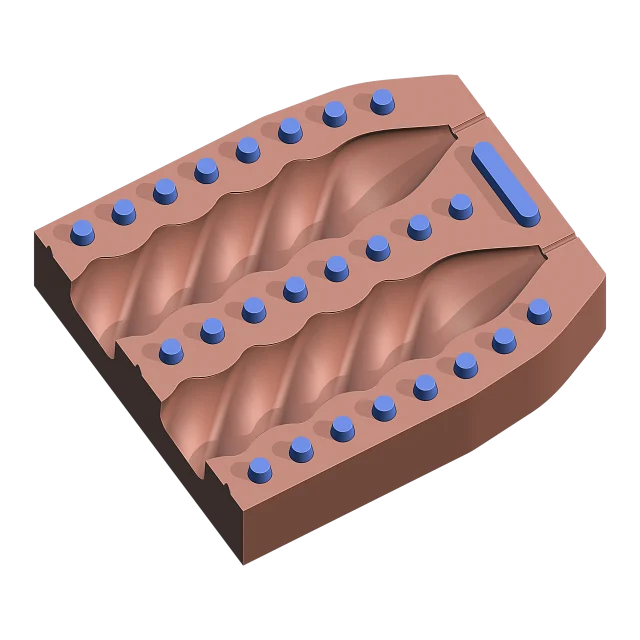
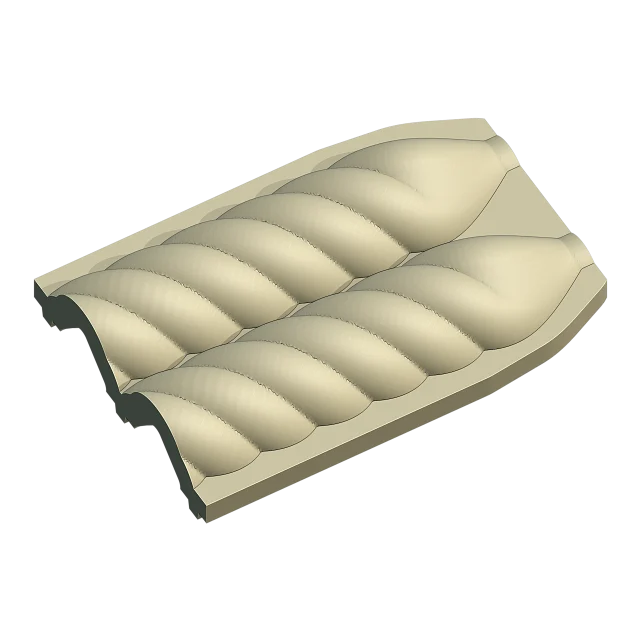
Two-Part Mold: Two halves opened, twisted candles
Two halves opened, twisted candles
Two-Part Mold: Barrier keys: long bars
Barrier keys: long bars
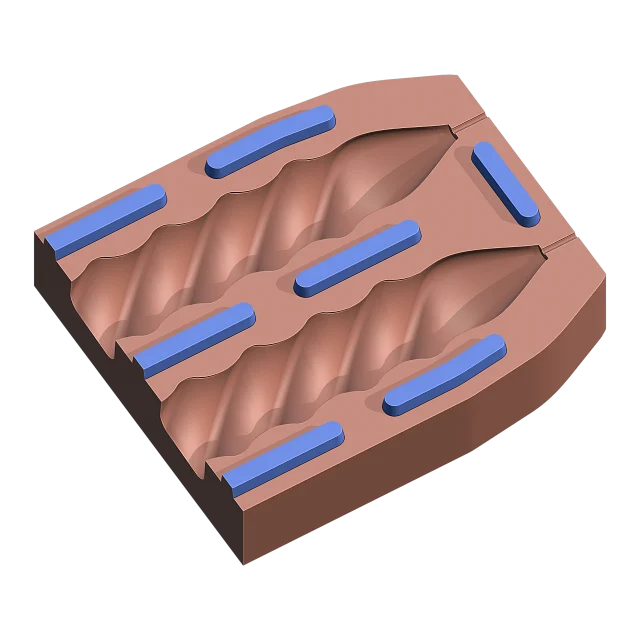
Two-Part Mold: Pin keys: rows of studs
Pin keys: rows of studs
Two-Part Mold: The Contoured back follows each cavity
The Contoured back follows each cavity

Multi-Part

Pro

In Pro.

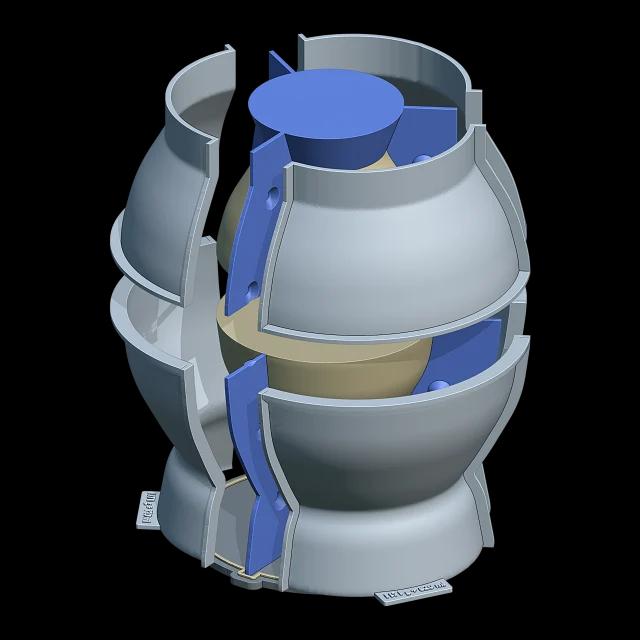
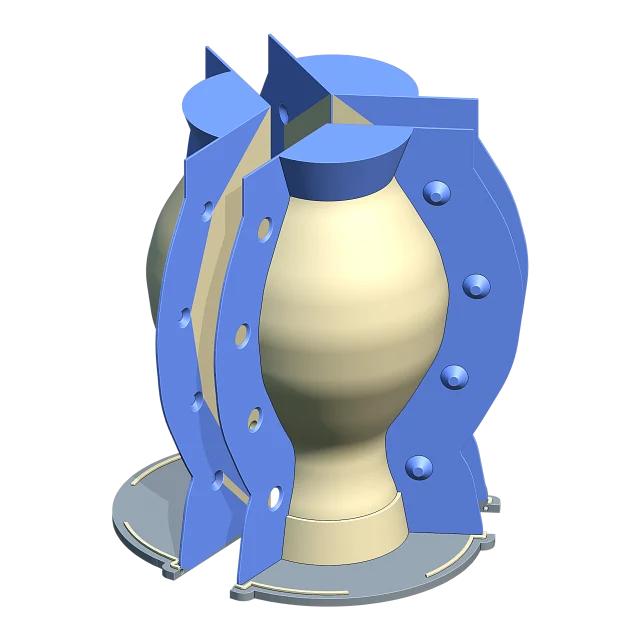
Several silicone parts from one pour, between printed split walls, each with a keyed parting face. You get a thin silicone skin and a printed box that holds the parts again while you cast.

For models a one-piece skin cannot come off, such as a sitting dog or a bust.

  • Split Planes: Front–Back or Left–Right for two parts, both for four
  • Model Plate: Single Plate (one print) or Part by Part (one piece a part)
  • Bottom: Open or Closed (an 8 mm pour channel at the top)
  • Seam Keys: Barrier (a tube) or Pin (spheres), 4 mm
  • The model must be a closed solid (run Heal first)
Multi-Part: Split wall on the base, box halves apart
Split wall on the base, box halves apart
Multi-Part: Barrier: a tube key on the split wall
Barrier: a tube key on the split wall
Multi-Part: Closed Bottom: the pour channel at the top
Closed Bottom: the pour channel at the top
Multi-Part: Part by Part: the model plate in four
Part by Part: the model plate in four

Cored Mold

Pro

In Pro.

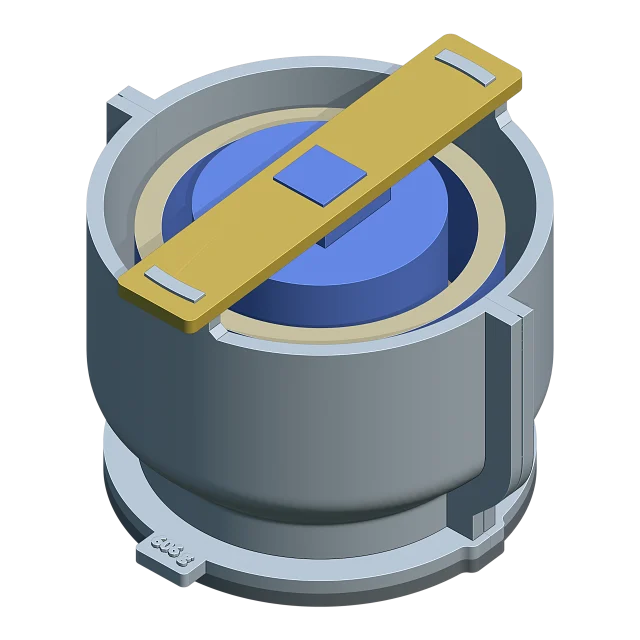
A Fitted Box for hollow models: planters, pots, candle holders. A printed core sits in the hollow, so the silicone there is a thin skin, not a solid plug.

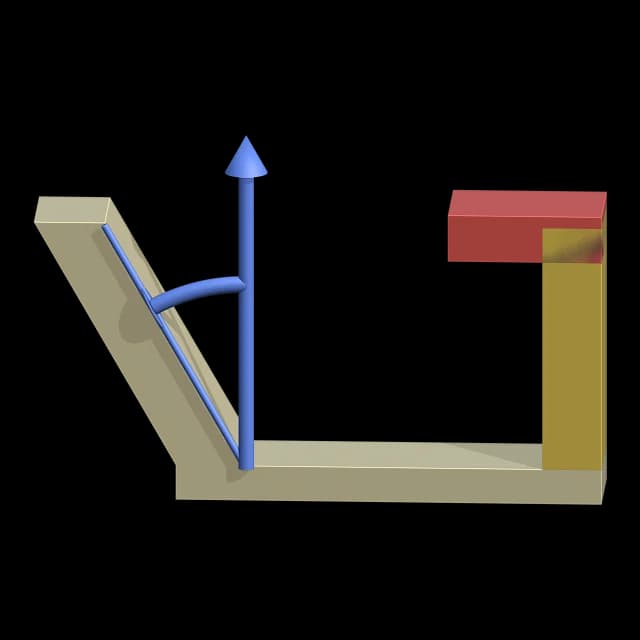
A flat bar across the box rests on two tabs at the rim and holds the core by its square key; the core lifts out upward.

  • Inner Thickness 9 mm
  • Power: Balanced or Aggressive (for smaller hollows)
  • The top is always flattened (no funnel)
  • The core and the bar print too
Cored Mold: Planter mold: the core and the bar across
Planter mold: the core and the bar across
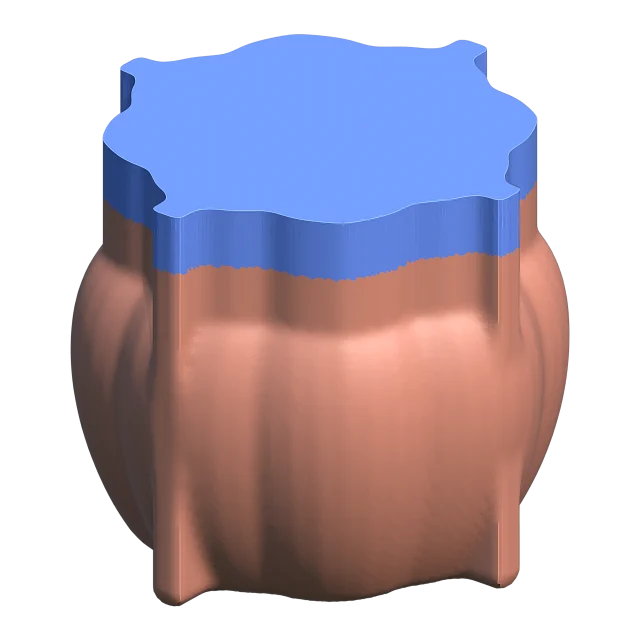
Cored Mold: Flatten Top: a straight, flat column
Flatten Top: a straight, flat column

Slip Cast

Pro

In Pro.

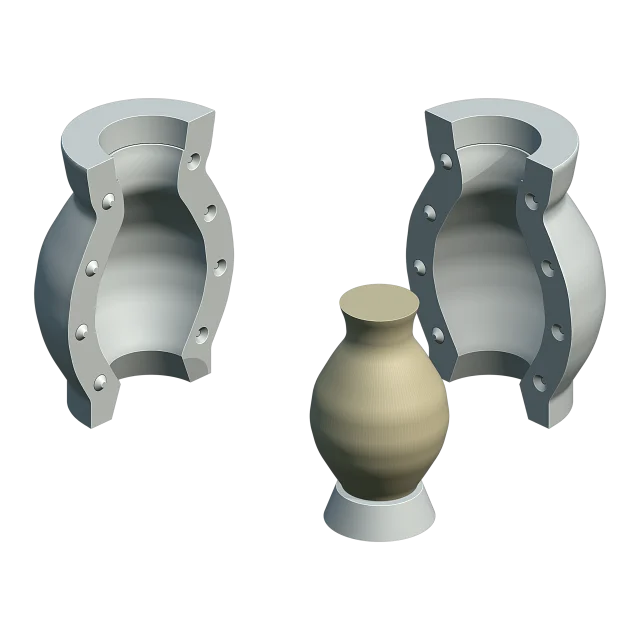
Designs a plaster mold for ceramic slip casting. The plaster mold itself is not printed: what you print is a model plate carrying the model's copy, the walls between the pieces and a case. You pour the plaster into every chamber at once; after 45-60 minutes the pieces come out and dry for a few days.

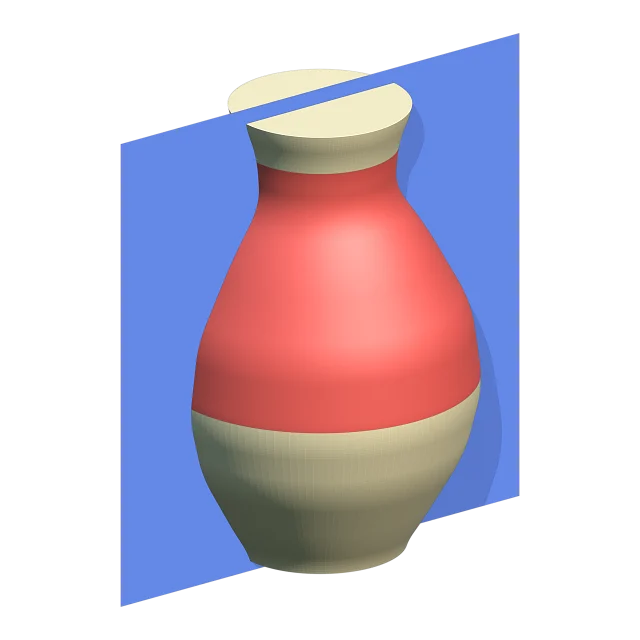
Parts sets 1-6 side pieces round the model's upright axis. Automatic finds the count and the turn that lock least, and shows in red the faces a piece would lock on. The model is grown by the clay's shrinkage, so you draw it at fired size.

Each case part's tab carries its own piece's plaster and water in raised text (such as 1240 g + 868 ml). Export writes every printed part as its own STL and an A4 casting sheet: the amounts piece by piece, the mix and the steps of the cast.
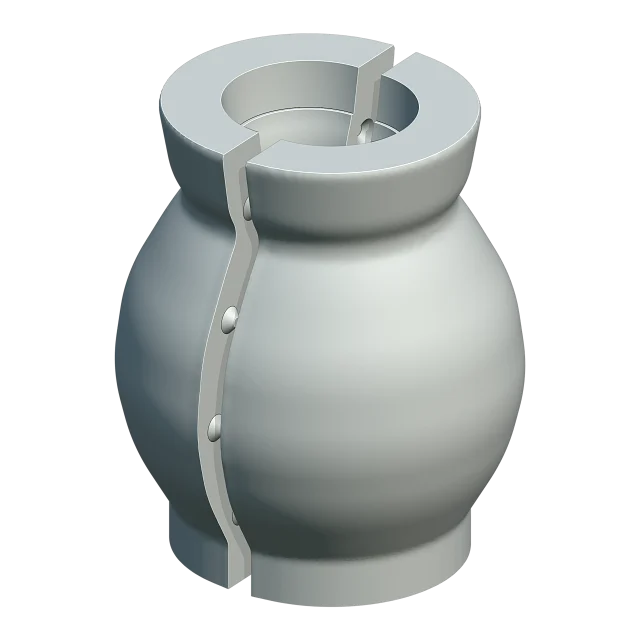
The model must be a closed solid, standing upright as it will be cast, at fired size; Cage Mold does not turn or scale it. Undercuts are not filled: the share that locks is shown, and you lower it with Parts or Turn.

  • Opening: Rim (a vessel poured through its top) or Base (a figure poured through its base, head down)
  • Parts: Automatic or 1-6 side pieces; Turn turns the seams
  • Shrinkage 12 %: porcelain ~13-15 %, stoneware 11-13 %, earthenware 6-8 %
  • Bottom Piece: a plug under the foot that forms a foot ring's recess too
  • Spare: Collar (plaster), Printed Spout or Pour Holes
  • Natches: male natches and sockets on every piece, 16 mm
  • Plaster Thickness 30 mm; Consistency 70 (70 ml water to 100 g plaster)
  • The card shows the plaster, the water and the slip it takes
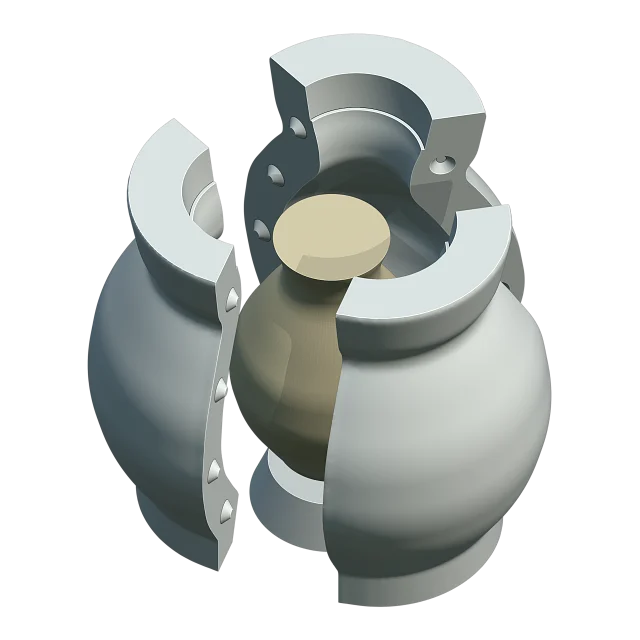
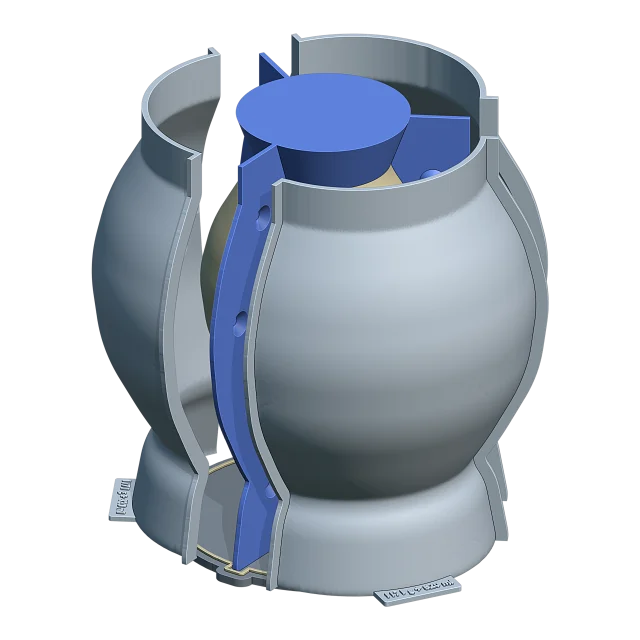
Slip Cast: Two plaster halves opened, the vase on its bottom piece
Two plaster halves opened, the vase on its bottom piece
Slip Cast: Automatic: the seam guide, red faces would lock
Automatic: the seam guide, red faces would lock
Slip Cast: Three side pieces drawn apart round the vase
Three side pieces drawn apart round the vase
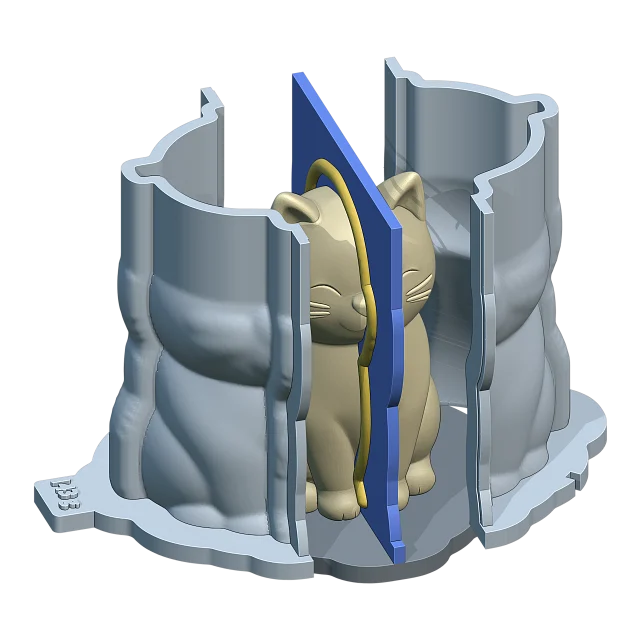
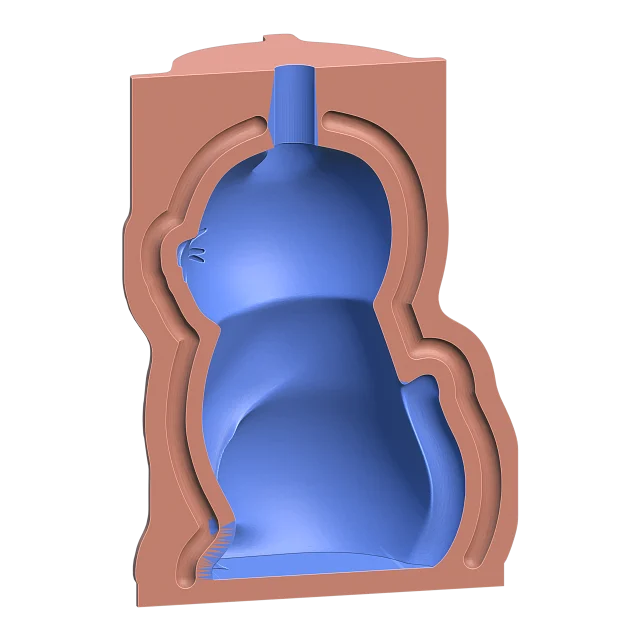
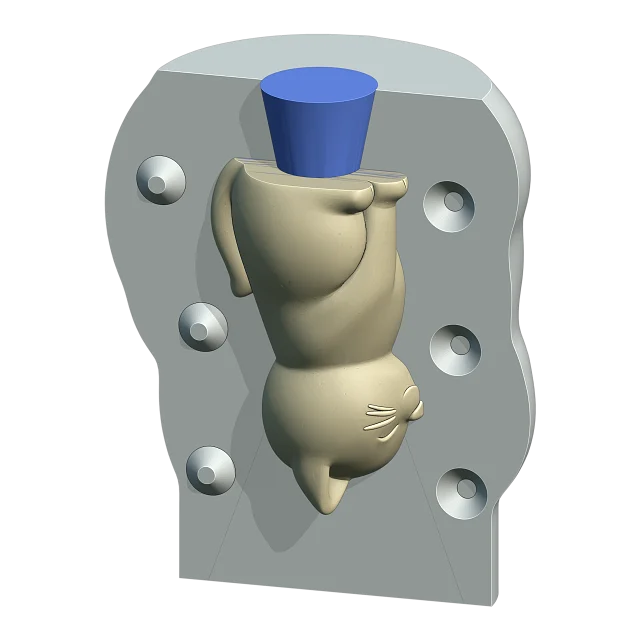
Slip Cast: Base: the cat head down, a pour hole in its base
Base: the cat head down, a pour hole in its base
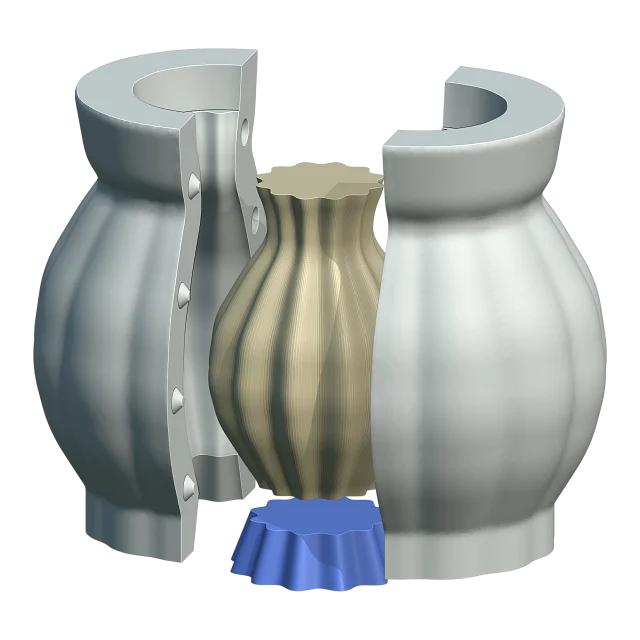
Slip Cast: The bottom piece follows the ribbed foot
The bottom piece follows the ribbed foot
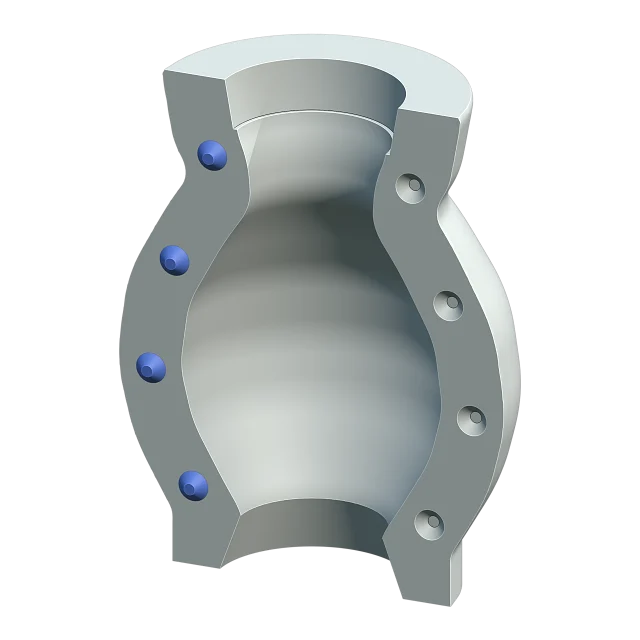
Slip Cast: Male natches on one piece's seam face
Male natches on one piece's seam face
Slip Cast: The model plate and the case parts drawn back
The model plate and the case parts drawn back

Slip Cast options

Pro

In Pro.

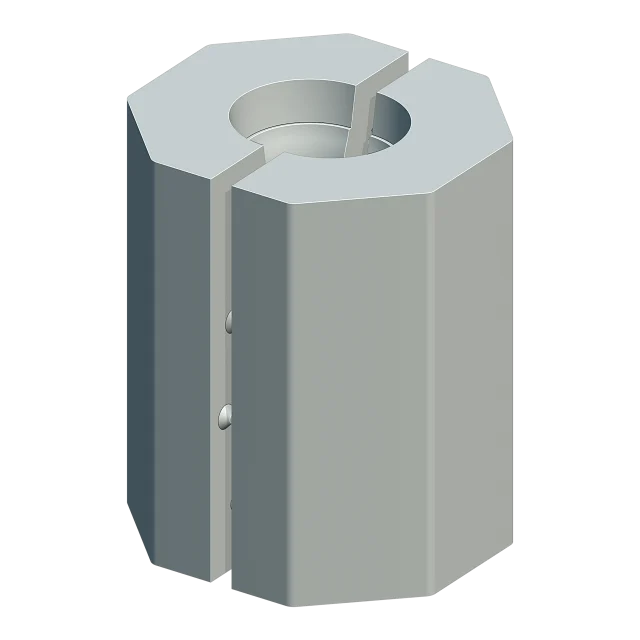
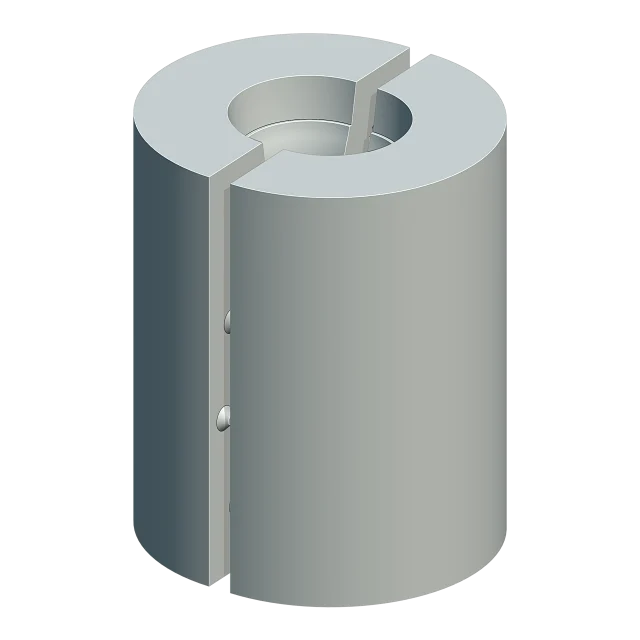
Outside: Contoured follows the cavity at Plaster Thickness, absorbs evenly and uses the least plaster; Prism has flat sides with rounded corners, Round is a cylinder.

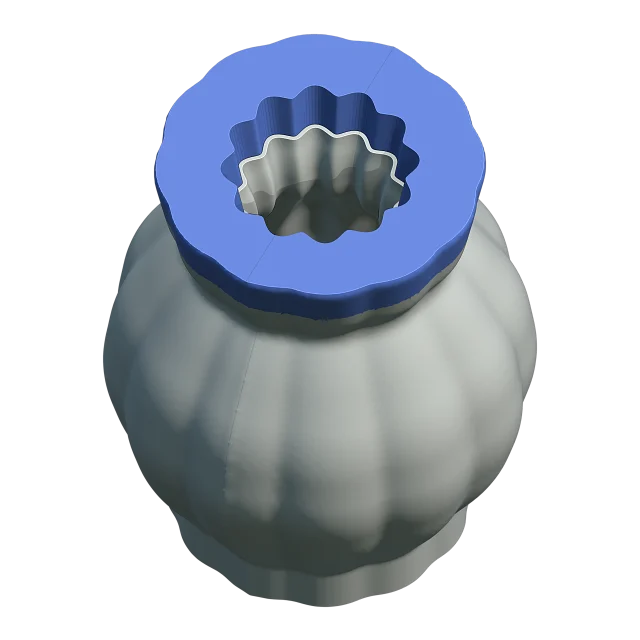
The spare holds slip while the wall builds: the clay in a plaster Collar is cut off at the rim, a PLA Printed Spout absorbs no water so the rim needs no trimming, and Pour Holes go into a figure's closed base. A collar or spout can follow a ribbed rim too.

Printed parts taller than Print Height (256 mm) are cut into tiers that are pinned and clipped; the model plate prints in one piece or one per side piece. The plaster pieces are never cut in height. The printed parts can be used again for more plaster molds.

  • Outside: Contoured, Prism (Faces 8) or Round
  • Spare Shape: Plain or Model's Outline
  • Print Height 256 mm; taller parts are cut into tiers
  • Model Plate: Single Plate or Part by Part
  • Split Wall 3 mm, Case Wall 3.5 mm, Pour Clips
Slip Cast options: Contoured: the closed mold follows the vase
Contoured: the closed mold follows the vase
Slip Cast options: Prism: eight flat sides
Prism: eight flat sides
Slip Cast options: Round: a plain cylinder
Round: a plain cylinder
Slip Cast options: The spare follows the ribbed rim
The spare follows the ribbed rim
Slip Cast options: A tall mold cut into two tiers
A tall mold cut into two tiers
Slip Cast options: The model plate part by part, apart
The model plate part by part, apart

Injection Mold

NewPro

In Pro.

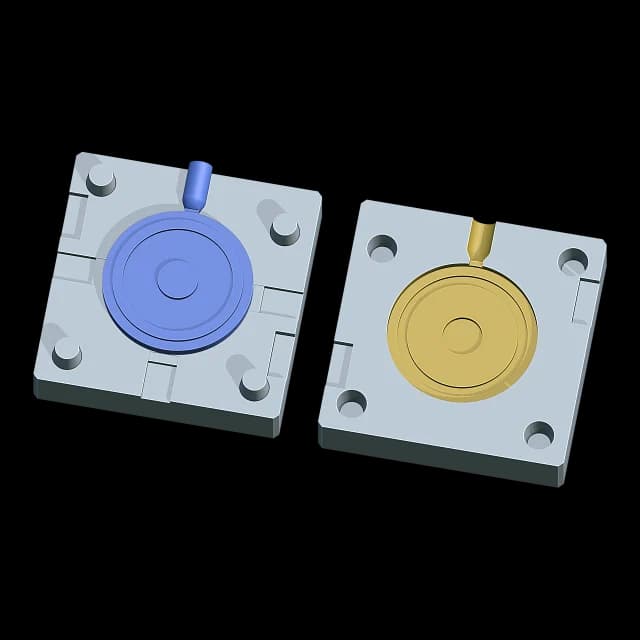
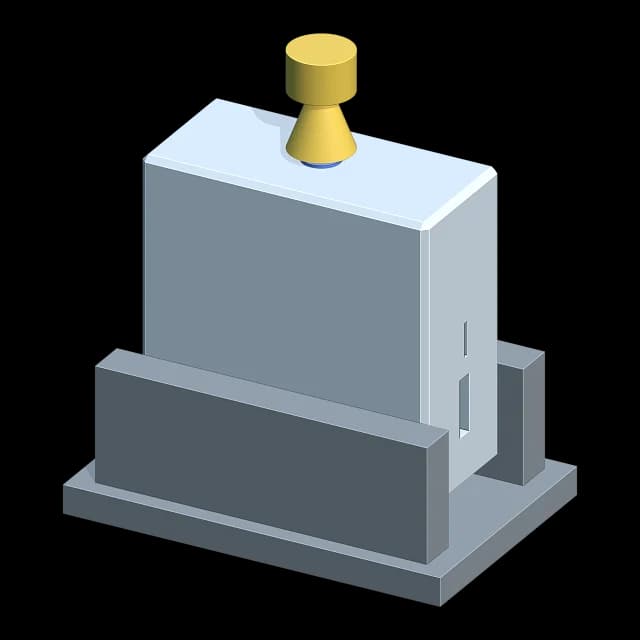
Designs two printed mold halves for small desktop plastic injection machines: one cavity, a flat parting plane. The cavity is the part grown by the plastic's shrinkage, taken from a table of common plastics (PP by default).

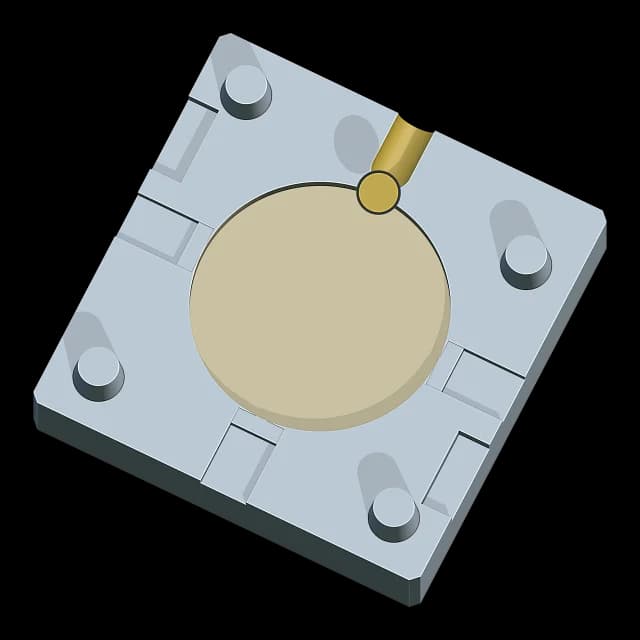
A sprue runs from the mold's top edge, where the machine's nozzle seats, down to the gate, which Cage Mold places for you or puts where you click on the part. Vents let the air out, printed pins or pin holes line the halves up, and pry slots help you open them.

  • Machine: Vise (the block grows round the part) or Frame Insert (fixed-size halves for a machine's metal frame, 76.2 × 86.6 × 25.9 mm by default)
  • Plastic: a table of common plastics sets the shrinkage; PP by default
  • Sprue Top: Straight or Cone, a seat for the machine's nozzle
  • Gate: Automatic, or where you click on the part
  • Alignment: Printed Pins or Pin Holes; Pry Slots to open the halves
  • Mold Material: Resin, Carbon FDM (a carbon-filled filament) or Aluminium sets the vent depth
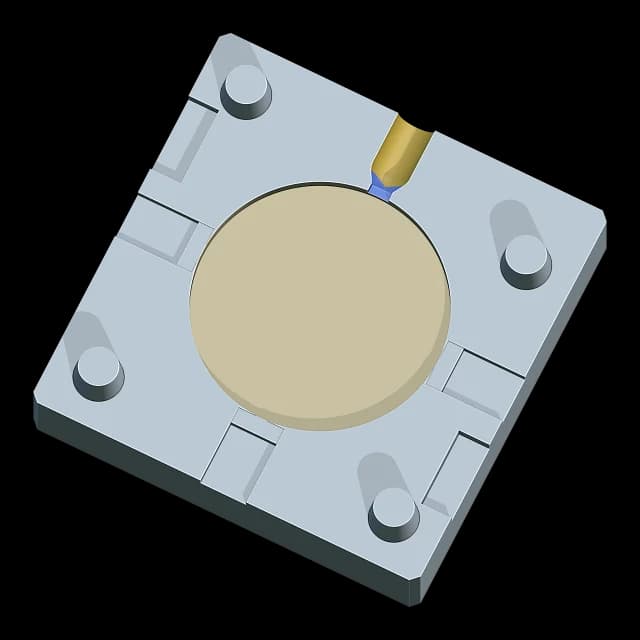
Injection Mold: The two halves opened: the cavity and the sprue
The two halves opened: the cavity and the sprue
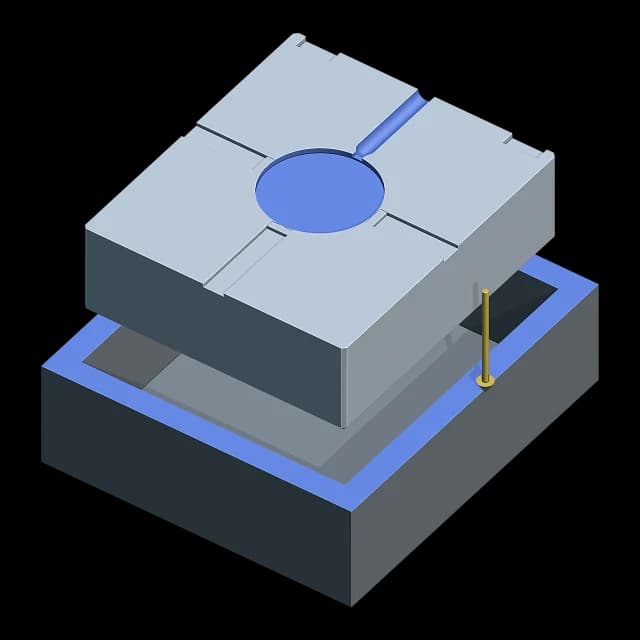
Injection Mold: Vise: the closed mold between the jaws, the nozzle on top
Vise: the closed mold between the jaws, the nozzle on top
Injection Mold: Frame Insert: a half dropping into the frame's pocket
Frame Insert: a half dropping into the frame's pocket
Injection Mold: The cavity grown round the part by the plastic's shrinkage
The cavity grown round the part by the plastic's shrinkage
Injection Mold: Automatic: the gate between the sprue and the cavity
Automatic: the gate between the sprue and the cavity

Injection Mold options

Pro

In Pro.

Sprue Top is Straight or Cone: a cone opens Top Ø across at the mold's edge, a seat for a bigger or smaller nozzle. Automatic puts the gate where the part is as thick as anywhere and nearest the nozzle, so the sprue stays short; Pick Gate puts it where you click. The gate's thickness and width follow the wall there.

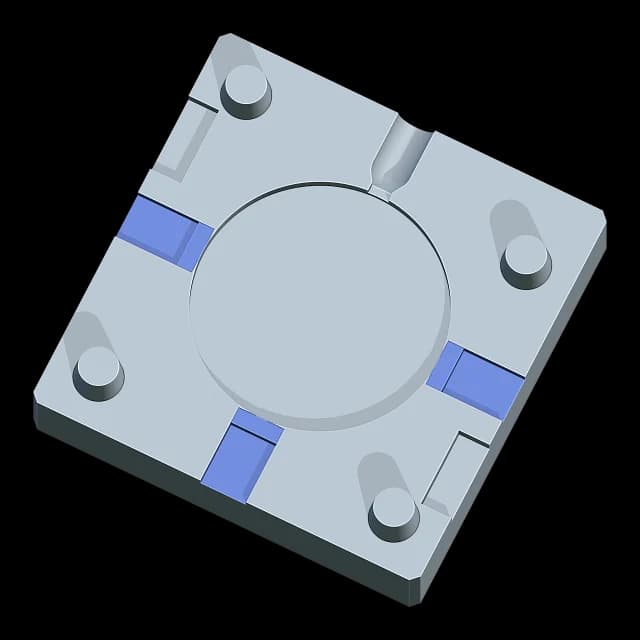
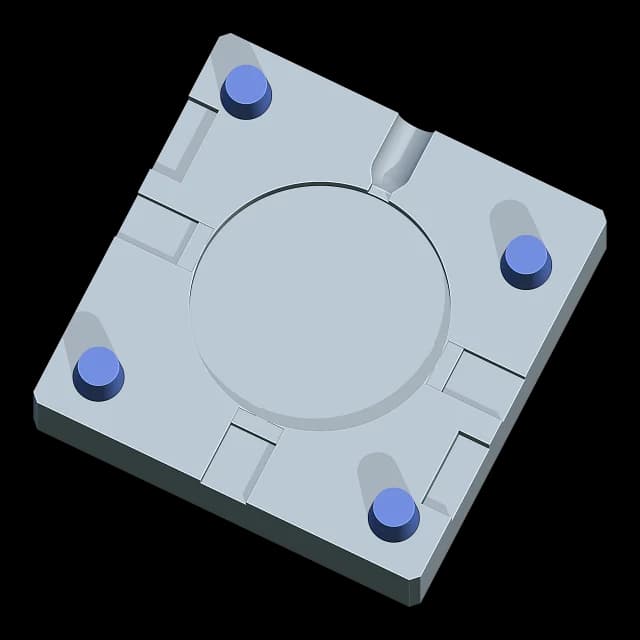
Before you build, the parting guide shows the faces that lock in red and those under the Draft Angle in yellow. Vents run from the cavity to the mold's edge, as deep as the mold material allows; Printed Pins line the halves up, or Pin Holes take steel dowels; Pry Slots help you open them.

  • Sprue Ø 4.8 mm; Cone with Top Ø 8 mm
  • Gate: Automatic or Picked; its thickness 60 % of the wall
  • Vents: one per 40 mm of outline, 2-6; 0.05 mm deep in Resin, 0.10 mm in Carbon FDM
  • Draft Angle 1°; locking faces in red, too-straight ones in yellow
  • Alignment: Printed Pins, Pin Holes or None (a frame aligns)
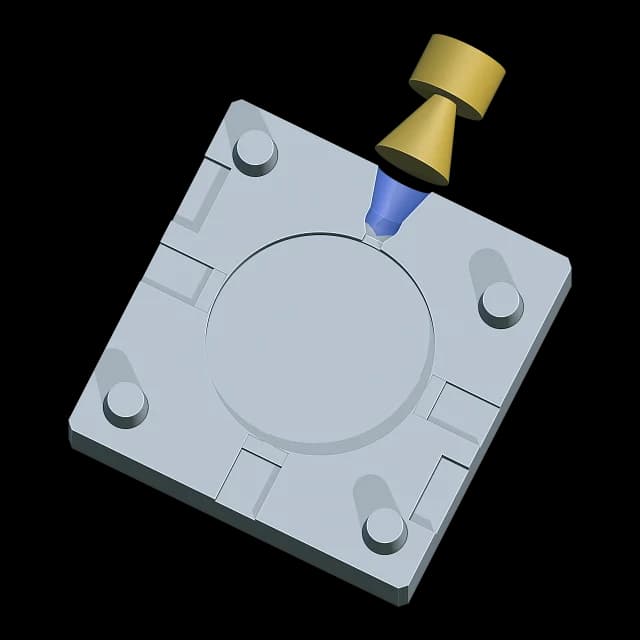
Injection Mold options: Cone: a funnel at the top edge for the nozzle
Cone: a funnel at the top edge for the nozzle
Injection Mold options: Picked: the gate where you clicked
Picked: the gate where you clicked
Injection Mold options: Vents from the cavity to the mold's edge
Vents from the cavity to the mold's edge
Injection Mold options: Draft: a sloped wall, a straight one in yellow, a locking lip in red
Draft: a sloped wall, a straight one in yellow, a locking lip in red
Injection Mold options: Printed Pins on half B
Printed Pins on half B
Injection Mold options: Pry Slots in the mold's sides
Pry Slots in the mold's sides

Tools and options

Pocket Fill

Pro

In Pro.

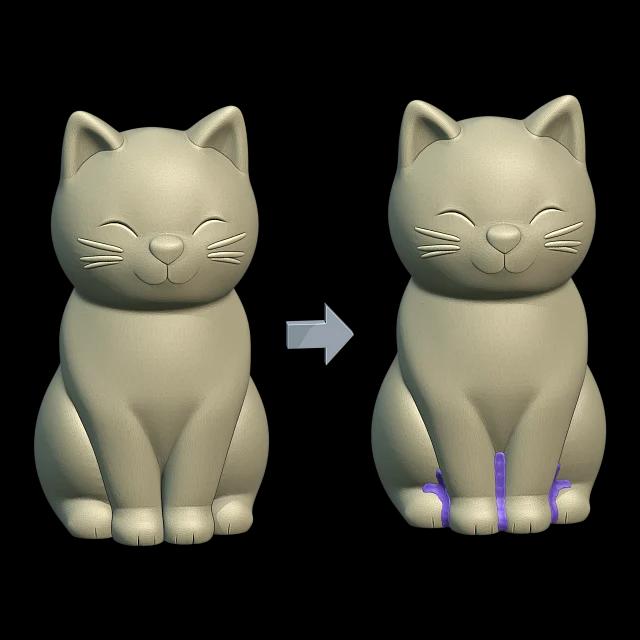
Adds filler pieces to the model where silicone would tear or trap air. Each kind has a colour: green for crevices under 3 mm, blue for hollows behind openings, orange for air pockets the rising silicone cannot empty, brown for pieces taken down to the floor.

The pieces come as separate objects you can check or delete. Confirm adds them to the model, Remove brings the model back. It changes the model on purpose: those places come out filled in the cast.

  • Detail: Draft, Quick, Standard or Fine
  • Remove by Colour deletes every piece of one colour
  • Extend to Floor takes the selected pieces down to the floor
  • Works before building, for every mold type
Pocket Fill: The cat before and after, coloured fillers
The cat before and after, coloured fillers

Split Planes

Core

One plane in every package; both planes and Turn in Core and Pro.

Sets the vertical planes the box is cut on. Before building they show as blue guides you move with the Move tool.

Front–Back parts the box into a front and a back half; Left–Right into a left and a right half. Both give four box parts. Turn turns the guides together, and the whole box is built square to them.

  • Turn: -90° to 90°, on the Fitted Box
  • On the Fitted Box and Cored Mold; Multi-Part has its own splits
  • A turned split costs no more silicone than a straight one
Split Planes: Front–Back: two box parts
Front–Back: two box parts
Split Planes: Left–Right: two parts the other way
Left–Right: two parts the other way
Split Planes: Both planes: four box parts
Both planes: four box parts

Locks and screws

Lite

In every package.

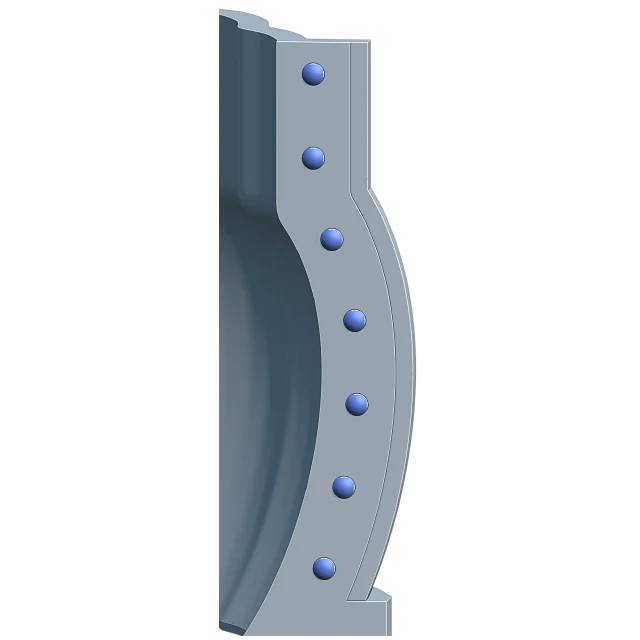
Everything that holds the box parts and the base in place comes in every package. Printed U-clips go over the seam flanges, and the feet sit on the base with pins and clips.

If you want, a lock goes up the seam too: Barrier is a rounded rib, Pin a row of spheres. The male half is on one part and its slightly larger socket on the other.

  • Seam Flanges 6 × 7 mm and Seam Clips (U-clips)
  • Screw Holes: 4 mm through both flanges, if you want them
  • Base Keys: Pin or Barrier, with Base Clips
  • The model fixed (one print with the base) or a separate piece that fits one way on Model Pins
Locks and screws: Barrier: a rib up the seam flange
Barrier: a rib up the seam flange
Locks and screws: Pin: spheres up the seam flange
Pin: spheres up the seam flange
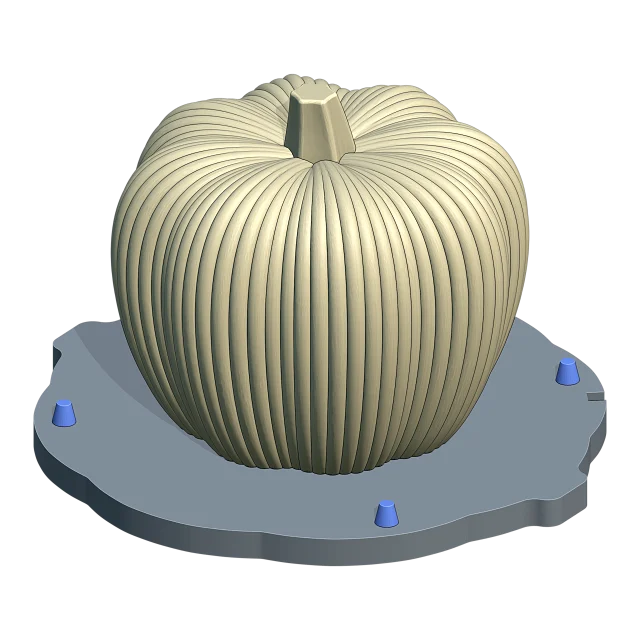
Locks and screws: Tapered alignment pins on the base
Tapered alignment pins on the base
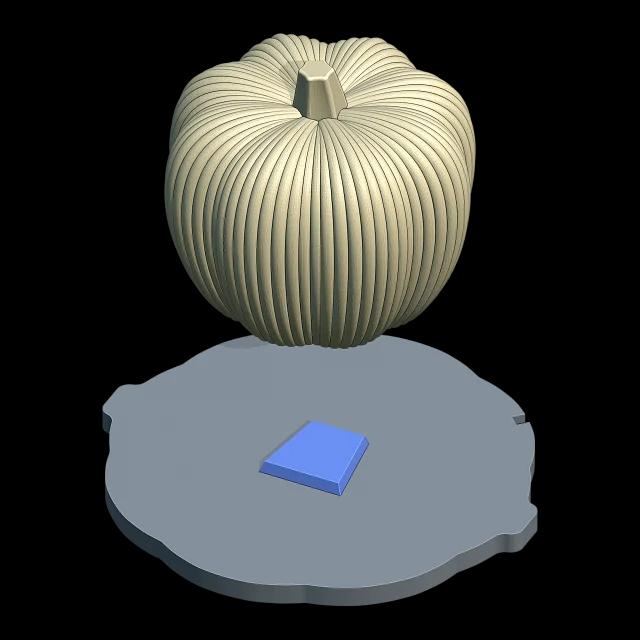
Locks and screws: Model Pins: the peg under the lifted model
Model Pins: the peg under the lifted model

Channels and funnel

Lite

In every package.

Support Channels are silicone plates on the split planes, one on X and one on Y; on a split plane the plate's ends give the box its seam ears. With Adjusted the plates and the box follow the model; Straight gives flat plates and flat box sides.

On top there is a funnel by default: above 80 % of the model's height the walls rise straight and the silicone is poured to the rim. Flatten leaves a straight, flat-topped column instead.

  • Channel Width 6 mm, Depth 6 mm
  • Funnel: Start Height 80 %, Extension 5 mm
  • With Core's Step by Step you edit the plates and the funnel before Confirm
  • Not on Tray or Two-Part; the Cored Mold's top is always flattened
Channels and funnel: Adjusted: the plates follow the model
Adjusted: the plates follow the model
Channels and funnel: Straight: flat plates, flat box sides
Straight: flat plates, flat box sides
Channels and funnel: Funnel: a pour column over the model
Funnel: a pour column over the model
Channels and funnel: Flatten: a straight, flat-topped column
Flatten: a straight, flat-topped column

Casting Box

Pro

In Pro, for every mold type.

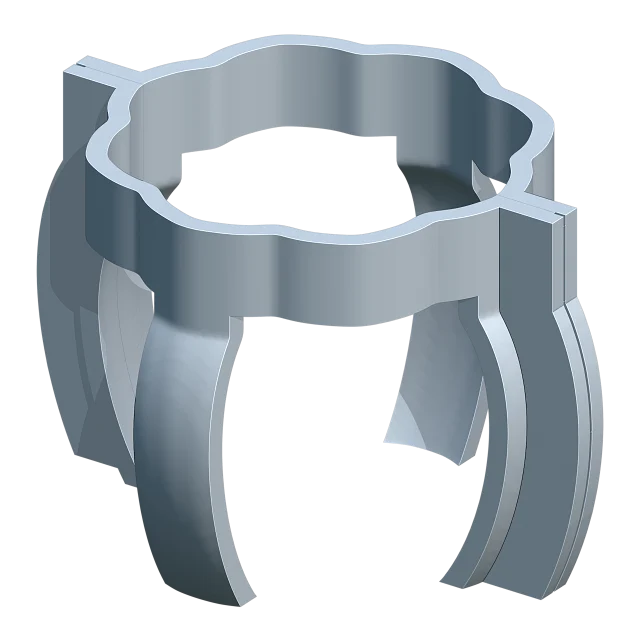
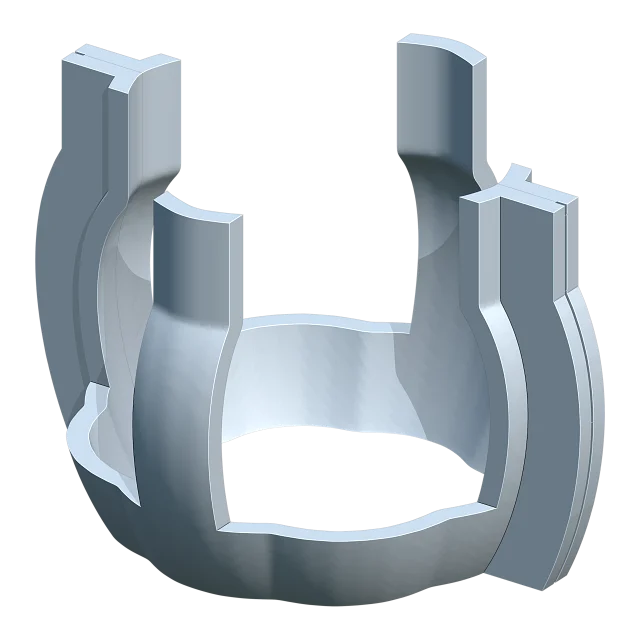
A second printed shell that holds the cured silicone while you cast into it. It splits like the mold, with the same seam ears, so the same clips fit. It runs from the floor to the silicone's top.

Optimized is 15 mm bands round the split planes and a ring at the top or the bottom; Standard is the whole shell.

  • Optimized (the default) or Standard
  • Ring: Top or Bottom
  • Its own wall thickness if you want (5 mm)
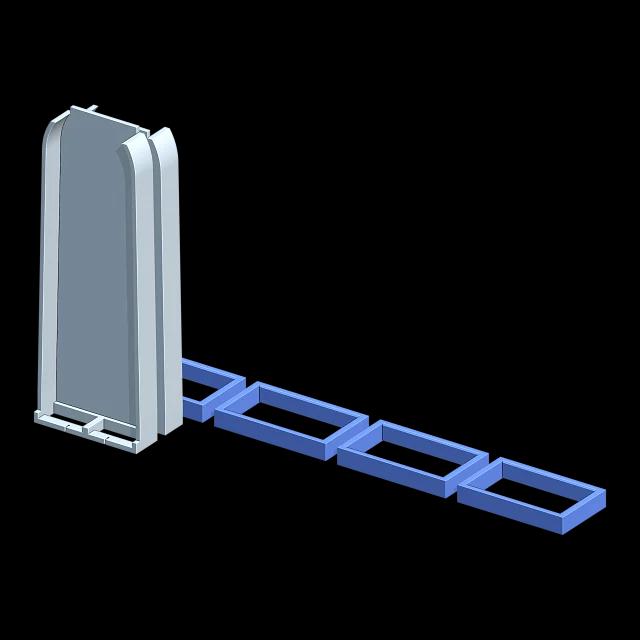
  • On a Tray a floorless frame; on a Two-Part a casting cage with Ring or Claw clamps
Casting Box: Standard: the whole casting shell
Standard: the whole casting shell
Casting Box: Optimized: bands and a top ring
Optimized: bands and a top ring
Casting Box: Optimized with the ring at the bottom
Optimized with the ring at the bottom
Casting Box: Two-Part casting cage with Ring clamps
Two-Part casting cage with Ring clamps

Watermark

Pro

In Pro.

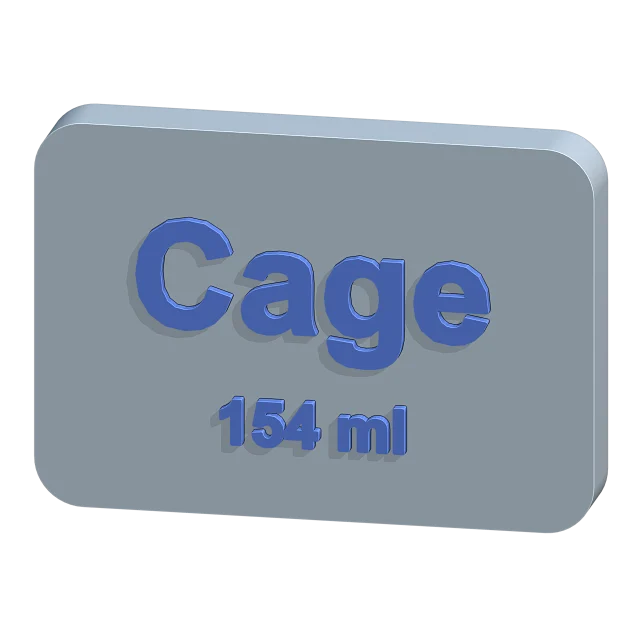
Engraves or raises text, an image (a logo) or the casting volume (such as 154 ml) on the mold.

The mark follows the mouse flat on the surface: the wheel turns it, Shift and the wheel scale it, a click stamps it. It needs a built box; an engraving leaves at least 1.2 mm of wall.

  • Text, Image or Casting Volume
  • Engraved or Raised; Extrusion 0.8 mm
  • Font: Blender Default, Arial or Arial Bold
  • A mark on the draft goes into the silicone, on the built mold into the printed part
Watermark: Raised text and the casting volume
Raised text and the casting volume

Hollow and Planter

Core

Hollow in Core and Pro; Make Planter in Pro.

Hollow makes the model a shell: a 2 mm wall, nowhere thinner. With Open Bottom on, the hollow opens through the bottom.

Make Planter cuts the model flat 10 mm below its top and hollows it with a 2 mm wall: a flat rim and a floor as thick as the wall, a planter. The mold for such a planter is an Cored Mold.

  • Hollow: Quality Draft, Normal or Fine
  • Make Planter: Cut from Top 10 mm
  • Both keep the original; Remove brings it back
  • An open mesh is refused (run Heal first)
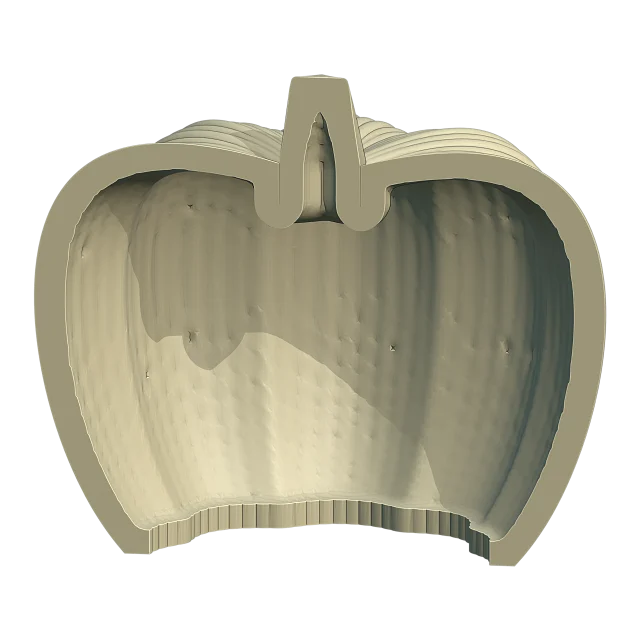
Hollow and Planter: The pumpkin hollowed, cut open, open bottom
The pumpkin hollowed, cut open, open bottom
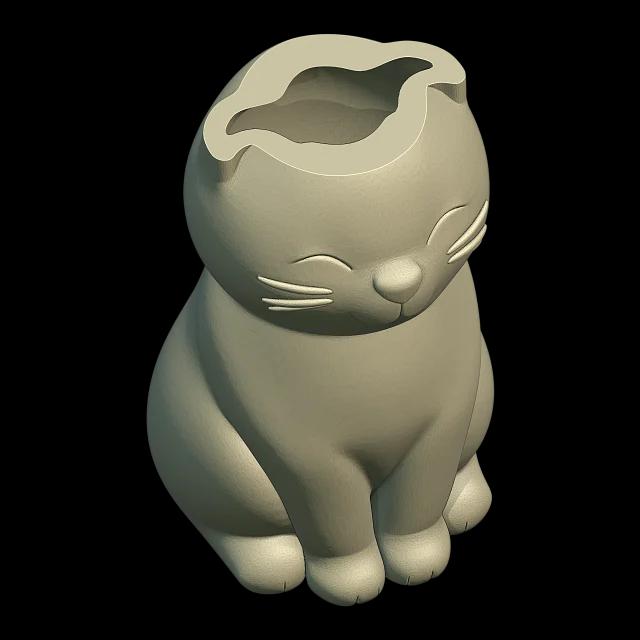
Hollow and Planter: The cat made a planter, open on top
The cat made a planter, open on top

Grid

Core

In Core and Pro.

Copies the model in rows and columns with Distance between them, so one mold casts many small parts.

The copies become part of the model. Running Grid again re-grids the original, and Remove Grid brings it back. Works before building, for every mold type.

  • Rows × Columns: 3 × 3 by default, 1-10 each
  • Distance 4 mm
  • The model's centre and floor stay where they are
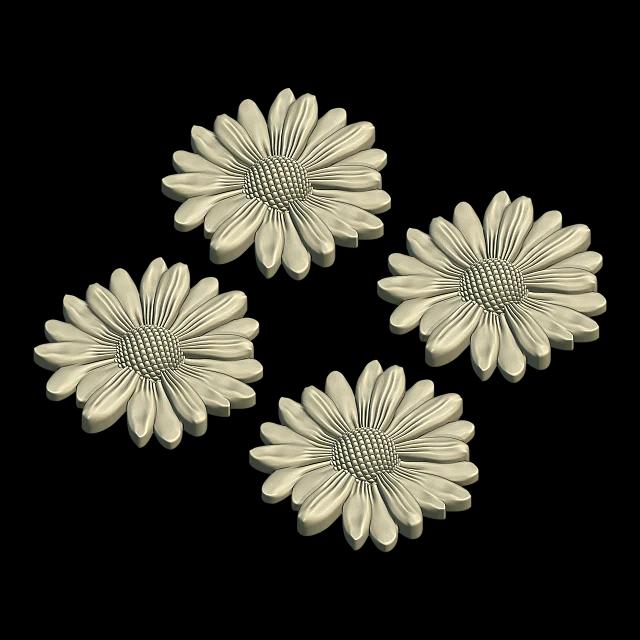
Grid: Daisies gridded two by two
Daisies gridded two by two

Try all of it free for 7 days

Every mold type and tool of the Pro package, open for 7 days; no card, no commitment. Then pick the package that fits you; moving up later costs only the difference.