Before the Pour
Open Before the Pour in the tool-card column on the right. It is included in every package. Choose how the model was printed and what you will cast; the checklist shows only the relevant steps. Hover over a step for the reason, or click it to read the explanation.
This is preparation advice, not a material preset. Browsing the checklist does not change your mold settings. Mold Thickness is shown above silicone steps; change it in Settings if needed. Core and Pro can also show the action card's existing silicone and A/B weights. Set the maker's ratio by weight first.
Preparation by print method
- Wash, post-cure as the resin maker directs, then dry. Residual resin and solvent can stop silicone curing. Use the resin maker's washing and post-curing schedule, including inside hollow prints.
- Seal or prime the resin print; let the coating dry. Use a coating compatible with your silicone. A coating can reduce contact with the resin, but does not guarantee a cure.
- Test the silicone on a spare resin print first. Use the same resin, cleaning and coating on the spare print. Wait the silicone maker's full cure time; a sticky patch means stop and change the preparation.
- Sand or fill layer lines you do not want in the cast. Silicone copies the print's surface, including layer lines. Keep details you want to reproduce.
- Seal the filament print and let it dry. A compatible sealer closes small surface gaps. Test it with the silicone before coating the model.
- Clean the model and let it dry. Dust, moisture and surface residues can spoil the mold surface or interfere with curing.
At the casting table
- Apply release where the casting material requires it. Follow the silicone and casting material makers' release instructions. Check compatibility on a spare surface first.
- Apply release wherever silicone will meet cured silicone. Silicone can bond to silicone at Two-Part and Multi-Part seams. Use a compatible release there and wherever the casting material requires it.
- Assemble dry, check seam clips and seal the base seam. A dry assembly reveals gaps before liquid escapes. Seat the clips fully and seal the base joint with a compatible material.
- Weigh the mix; use the card's A/B weights when shown. Set the maker's ratio by weight before using the A/B figures (Core or Pro). On Lite, weigh your batch to that ratio. Scrape the cup's sides and bottom while mixing.
- Degas or pour a thin stream into one low corner. Let silicone rise around the model to displace air. Use a pressure pot only if the whole box fits, and follow the pot and silicone makers' limits.
Material-specific checks
- Use thin epoxy layers or a slow resin; check Mold Thickness. Curing epoxy releases heat; a thin silicone mold can run hot. Follow the resin maker's maximum pour depth and cure schedule.
- Use food-grade silicone; keep printed parts away from food. Use silicone approved for your food, temperature and contact time, and follow its cure and cleaning instructions. Coatings, pigments and release agents must also suit food contact.
- For plaster or concrete, check the mix and the mold opening. Use Tray for a flat back or Fitted Box for a surrounding silicone mold. Follow the casting material's water ratio and demolding time. Ceramic slip needs Slip Cast instead.
- Use Slip Cast and follow its exported casting sheet. Ceramic slip needs absorbent plaster pieces. The Slip Cast sheet gives the plaster and water mix and the assembly steps; dry the plaster before casting slip.
- Dry-fit the injection halves and check the machine fit. Check alignment, clamping and the nozzle seat before using the machine. Follow the machine and mold material limits.
- Use Injection Mold and check its draft analysis. Rigid halves cannot peel away like silicone. Resolve the red locked faces in the draft check and follow the Injection Mold printing and casting steps.
Which mold?
In Which mold?, answer in order. The first Yes gives a recommendation; six No answers give Fitted Box. Use this type changes only the Generator's type, preserving the other settings. It does not build a mold. Finish a running job and Restart a draft or finished mold before choosing a different type.
CORE and PRO pills identify the required package on our mold pictures. A type outside your package stays visible, with a disabled button naming the package. Read the type's manual steps before printing or casting.
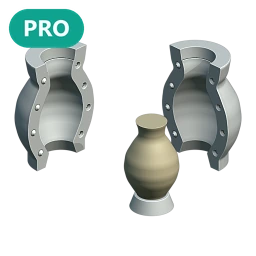 | Ceramic slip? Slip Cast Absorbent plaster pieces draw water from ceramic slip. |
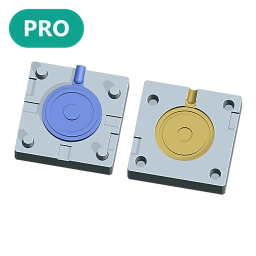 | Plastic in a machine? Injection Mold Rigid halves hold the cavity for machine injection. |
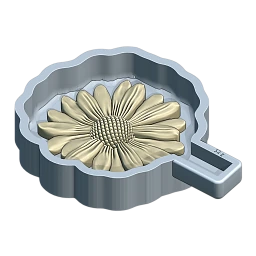 | A flat back that lies on a table? Tray An open tray leaves the flat back accessible. |
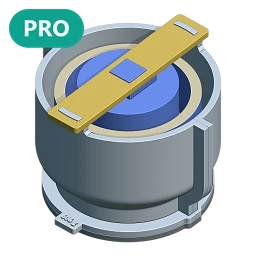 | A pot or planter, open on top? Cored Mold A printed core forms the hollow and saves silicone. |
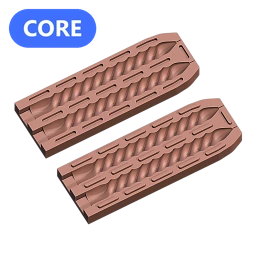 | Long, thin and closed all round, like a taper candle? Two-Part Mold Two silicone halves open along a long, enclosed model. |
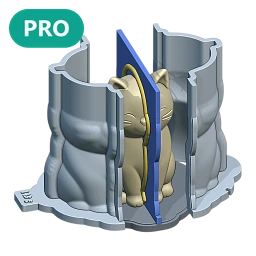 | Deep undercuts all round, like a sitting animal or bust? Multi-Part Separate keyed silicone parts release deep undercuts. |
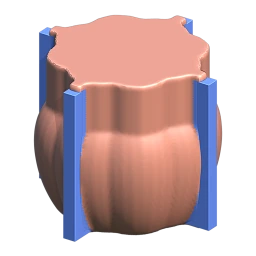 | If all six answers are No Fitted Box A fitted split box surrounds most other models with silicone. |