When does a mold need several parts?
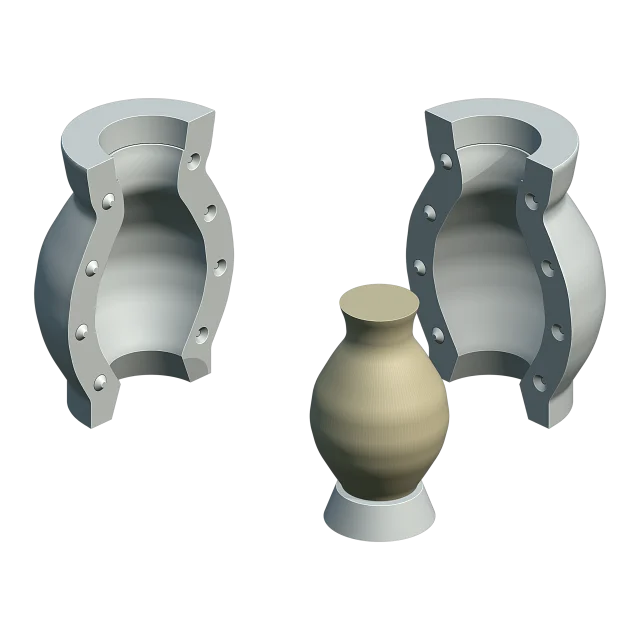
A thin silicone skin bends a long way, so shallow undercuts come out of a one-piece mold. It stops working when the skin would have to turn inside out to get past the model: arms held away from the body, a head turned over a shoulder, a deep gap between the legs. Then the silicone is split into parts, each pulled off in its own direction.
- Two parts: most figures and busts, split front to back or left to right.
- Four parts: models that lock in both directions, split both ways.
- Any material silicone takes: wax, plaster, concrete, resin.
A simpler model? How to make a 3D-printed silicone mold box →
What you need
- The model as a closed solid in millimetres, with a flat bottom to stand on.
- An FDM printer and PLA for the model plate, the box and the clips.
- Mold silicone, a scale, mixing cups and a stirrer; a vacuum chamber if you have one.
- The casting material: wax, plaster, concrete or resin.
In Cage Mold: Multi-Part is in the Pro package. Small holes in the model are closed for you; a model too broken for that stops Make Mold with a note to run Heal first.
1. Choose where to split
Each part must pull straight off the model. Run the split plane through the model's widest outline, so nothing on either side hangs over the plane: the part in front leaves forwards, the part behind leaves backwards. If an arm or an ear still hooks over the plane, turn the model before you add parts.
Every seam leaves a fine line on the cast. Put it where it shows least or is easy to clean: along the sides of a figure rather than across its face.
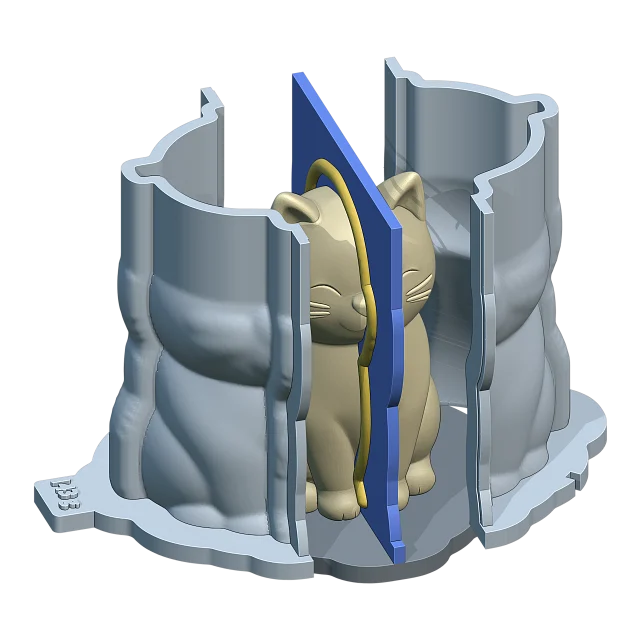
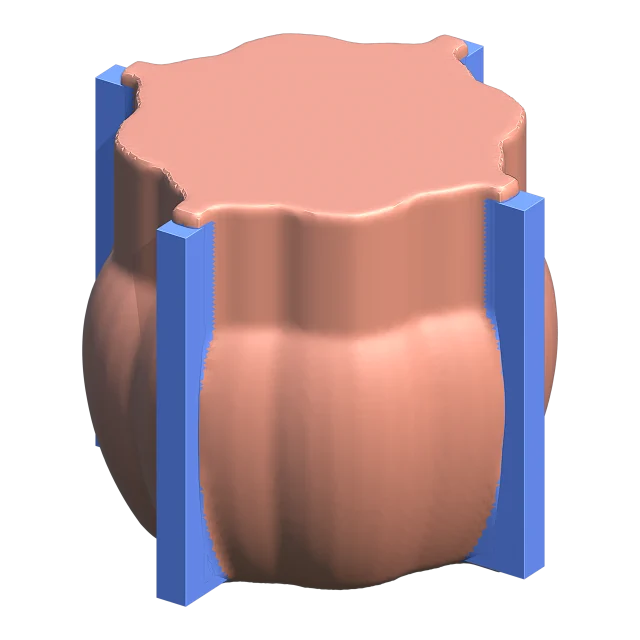
In Cage Mold: Split Planes is Front–Back or Left–Right for two parts, both for four; the blue guides stand through the model's centre and you move them over it. Recenter Planes puts them back. They do not turn from the sidebar: turn the model instead.
2. Split walls instead of clay walls
The classic way: bed the model in clay up to the seam line, pour the first part, take the clay away, brush on a release agent and pour the next. Each part waits for the one before it to cure, and without the release agent silicone sticks to silicone.
With printed split walls the model stands on a plate, thin walls rise from the plate along the seams and the box closes round it all. The silicone is poured once and the walls divide it as it fills. No part touches another while it cures, so no release agent is needed between them.
The wall has a thickness, so the model and the mold are drawn apart by it at every wall. Taken off the walls and closed, the parts meet on exactly the model's shape: the cast is never thinner by a wall.
In Cage Mold: Split Wall is 3 mm. The model copy, the base plate and the walls print as one Model Plate (Single Plate), or Part by Part: one piece a silicone part, pinned to the next.
3. Seam keys and the skin
Keys stop the parts from sliding when you close them: a ridge or bumps on one face, matching hollows in the other. On a printed wall they are shaped into the wall, so every part comes out of the pour with its keys already moulded.
- A round key running the whole seam also stops the casting material from creeping into the seam.
- A row of round bumps is enough on small parts.
- When a printed box holds the parts while you cast, the box keeps the shape and the silicone can stay a thin skin.

In Cage Mold: Seam Keys is Barrier (a tube along every seam) or Pin (a row of spheres); Key Diameter 4 mm, Key Tolerance 0.25 mm. Mold Thickness is 4.5 mm for this type.
4. Open or closed at the bottom
The cast has to go in somewhere. With the mold open at the bottom, the model stands on the plate, the silicone stops at its footprint, and you cast through the bottom with the mold turned over: right for figures on a flat base.
For a model with no flat base, the silicone closes under the model too, and the cast is poured through a narrow channel at the top that is cut off afterwards.
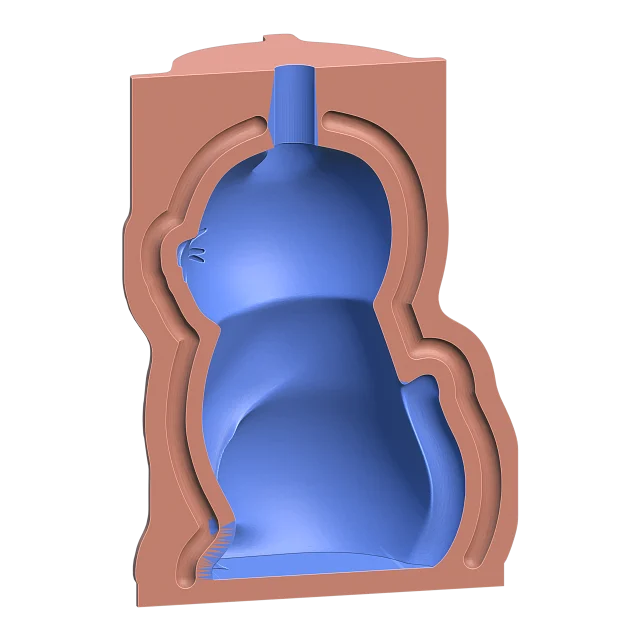
In Cage Mold: Bottom is Open or Closed. With Closed the model hangs on the split walls and a Pour Channel (8 mm) runs up from its highest point.
5. Print, assemble and pour the silicone
- Print the model plate, the box parts and the clips. The model's surface goes into the silicone, so print it with fine layers or sand it.
- Seat the box parts on the base and press the clips onto the seam ears, the wall between them.
- Weigh the silicone, mix about 5 % extra for losses, stir slowly and degas it if you can.
- Pour in a thin stream through the funnel. The walls divide the funnel too, so every part fills in the same pour.
- After the silicone's full cure time, take off the clips and the box parts and peel the parts off the walls and the model.
In Cage Mold: two sets of clips are printed, pour clips that hold two ears and the wall between them for the silicone, and cast clips that hold two ears for casting. Make Mold builds it all in one step; the silicone of all the parts is shown in grams and printed on a box part's foot.
6. Cast
- Close the silicone parts on their keys.
- Put them back in the box parts, this time without the walls, and press on the cast clips.
- Pour the casting material through the opening: the model's footprint, or the channel at the top.
- Once it has set, open the box and peel the parts away from the cast.
In Cage Mold (Pro): Casting Box builds a separate, thinner shell round the closed silicone parts, to cast in instead of the box parts.
Common mistakes
- Splitting a model that does not need it: every seam is a line to clean. If a one-piece skin comes off, use one.
- A pocket the walls close off, under a sitting figure or in the corner of two walls: the silicone cannot reach it, the cast fills it and locks the part. Move the planes or turn the model.
- A loose piece of the model, such as an eye that touches nothing: nothing holds it in the mold.
- A printed key in a printed socket of exactly its size: it does not go in. Leave a little play.
In Cage Mold: Confirm's note names a pocket the silicone cannot reach, with where it is, and a loose piece left out of the mold; a split plane dragged off the model stops Make Mold and says so.
Try it in Cage Mold
Multi-Part is in Cage Mold's Pro package. The 7-day Pro trial opens every Pro tool on one computer, with no card: build the mold for your own model and look at its parts before you print anything.
How much silicone do you need?
Type in the model's size; the calculator gives the silicone's volume, weight and the A/B amounts.